|
image from growfully.com Good morning. It was cold yesterday morning as single digits and wind blowing make the wind chill below zero. Luckily it was just yesterday. Now we are talking 50’s today with a south wind. Clear, blue sky this morning and will just get warmer each day. ENJOY…
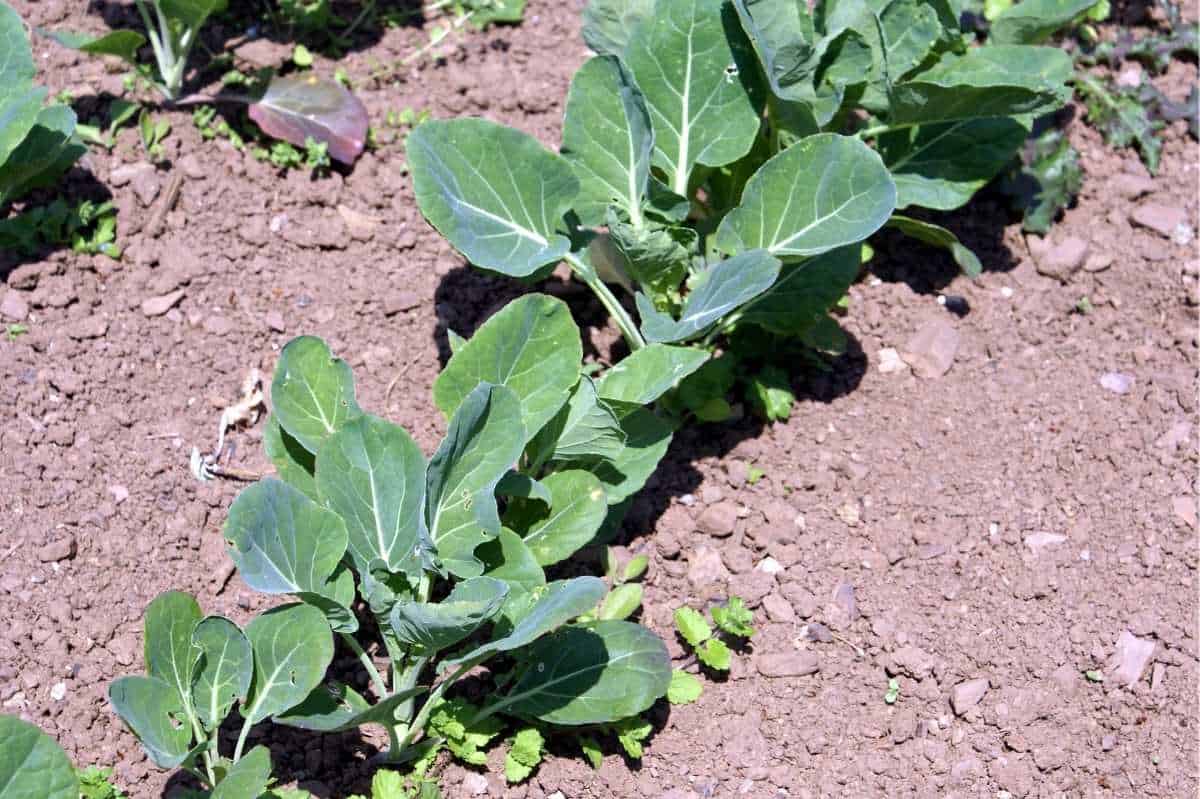
So of course, on the coldest morning, my plant plugs came in. But with a helping hand, I was walking over to feed the cats. I heard a vehicle, and it was the delivery van with my plants. I had to go and work a funeral at 9:00 so glad that I could get the plants inside the greenhouse. This was good. Now today, I will start the joy of planting and growing this season’s plants. You will read that planting of brussels sprouts should be done in the late summer or early fall. The plants need 80 to 100 days to grow, and like it cool. So I don’t think we have cool weather 80 days before we have a killing frost. What do you think? I would plant them in the spring and keep them well watered. I know of gardeners having good luck growing them, but they are a little harder to grow. Good Luck Planting, Growing, and Harvesting Brussels Sprouts by Catherine Boeckmann Learn how to grow brussels sprouts, a cool-weather crop that is planted in early spring or mid- to late summer for a crop that matures in the fall. These nutritious vegetables taste even better after a few light frosts! Here’s how to plant, grow, and harvest brussels sprouts in your garden. About Brussels Sprouts Named for Brussels, Belgium, where they were first cultivated in the 16th century, brussels sprouts are a vegetable that is commonly seen in the grocery store, but not-as-commonly seen in the home garden. This is probably because they aren’t the easiest vegetable to grow! They require a fairly long growing season (80–100 days to harvest) and are a cool-season crop, meaning that they produce best when grown for a fall or early winter harvest. The sprouts improve in flavor after a light frost or two. As long as you plant them at the right time, keep them cool and well watered during the heat of summer, and protect them from pests, brussels sprouts are a rewarding vegetable crop to grow—an accomplishment! Brussels sprouts are a cultivar (cultivated variety) of wild cabbage, Brassica oleracea, which is the same plant species that cabbage, broccoli, cauliflower, kale, kohlrabi, and a number of other popular food crops stem from. Over generations and generations, this versatile plant has been bred in different ways to highlight its different features—flowers, leaves, buds, stem, and root—to provide us with a wide variety of foods! Brussels sprouts form as buds along the main stem of the plant, just above each leaf axil. PLANTING Choose a planting site that gets full sun (6 to 8 hours of direct sunlight per day). Raised beds are especially recommended for cool-season vegetables, especially in the spring and fall, when temperatures are not consistent. Soil should be well-draining and moderately fertile. Work several inches of aged manure and/or compost into the soil to improve soil fertility and texture. When to Plant Brussels Sprouts Due to brussels sprouts’ need for a long growing season, we recommend planting them with a fall or winter harvest in mind. They do best when allowed to mature during the cool days of fall. To determine the optimum planting time, count backwards from your first fall frost date using the “days to maturity” listed on the seed packet. Generally, this means sowing brussels sprout seeds about 4 months before your first fall frost date. In regions with cold winters, where winter temperatures are often below freezing, start seeds in early to mid-summer. Plants will mature for a mid-fall or early winter harvest. In regions with mild or warm winters, where winter temperatures are occasionally or rarely below freezing, start seeds in mid- to late summer. Plants will mature for a mid- to late winter harvest. Brussels sprouts may be started from seed indoors or sown directly into the garden. We recommend starting seeds indoors, as this gives seedlings a headstart and helps to protect them from summer heat and pests. Direct-sown seeds can take a few weeks longer to mature, so add 20 days to your planting date calculation if you plan to sow outdoors. (In other words, sow seeds outdoors about 20 days earlier than if you were starting them indoors.) How to Plant Brussels Sprouts Sow seeds about ½ inch deep. If direct-sowing seeds outdoors, sow seeds about 2 to 3 inches apart. (Seedlings should be thinned to 12 to 24 inches apart when they reach about 6 inches tall.) Plant seedlings 12 to 24 inches apart. Water well at time of sowing/transplanting. GROWING Thin young plants to 12 to 24 inches apart when they reach 6 inches tall. Fertilize with a nitrogen-rich product after thinning. Repeat every 3 to 4 weeks. Mulch to retain moisture and keep the soil temperature cool through summer. If growing during hot weather, be sure to keep the plants well watered. Inconsistent moisture can lead to subpar sprout development. Brussels sprouts should receive about 1 to 1½ inches of water per square foot per week. Consider using row covers to protect young plants from pests. Brussels sprouts are usually planted outdoors right when pests are at their worst! Do not disturb the soil around the plants; roots are shallow and susceptible to damage. Brussels sprout plants usually reach heights of 2 to 3 feet, so plan accordingly; they may require staking. Remove yellowing leaves at the bottom of the plant to allow for more sunlight on the stalk and to focus plant energy on healthy growth. To encourage the sprouts to mature faster, cut off the top leaves 3 to 4 weeks before harvest. Note: If you intend to harvest sprouts into winter, leave the top leaves of the plant intact; they provide protection from snow. Also, cover plants with 10 to 12 inches of mulch. RECOMMENDED VARIETIES ‘Churchill’ is an early maturing plant, adaptable to most climates. ‘Diablo’ is known as a heavy producer. ‘Falstaff’ has a red/purple hue that holds when cooked ‘Jade Cross’ is a high-yield compact plant, resistant to some diseases and known for its tolerance for hotter weather. ‘Long Island Improved’ is an heirloom and a compact plant that prefers a cool summer. ‘Oliver’ is an early-maturing variety with a shorter growing season requirement (80–90 days). HARVESTING Sprouts mature from the bottom of the stalk upwards. Harvest sprouts from the bottom when they reach about 1 inch in diameter. If desired, after a moderate frost, pull up the entire stalk, roots and all. (Remove leaves first.) Then hang stalk upside down in a cool, dry basement or garage or barn. Store stalks (no roots) for about 1 month in a root cellar or basement. How to Store Brussels Sprouts Do not wash the sprouts before storing them, only right before use. Keep fresh-picked sprouts in a plastic bag for up to 5 days in the refrigerator. Taken from https://www.almanac.com/plant/brussels-sprouts Till next time this is Becky Litterer, Becky’s Greenhouse, Dougherty Iowa [email protected] 641-794-3337 cell 641-903-9365
0 Comments
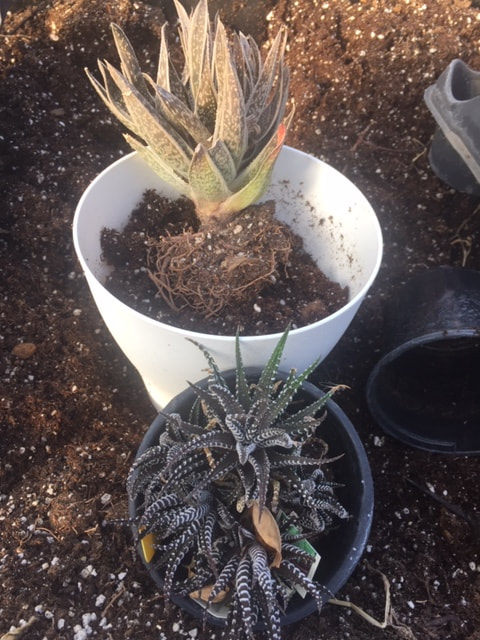
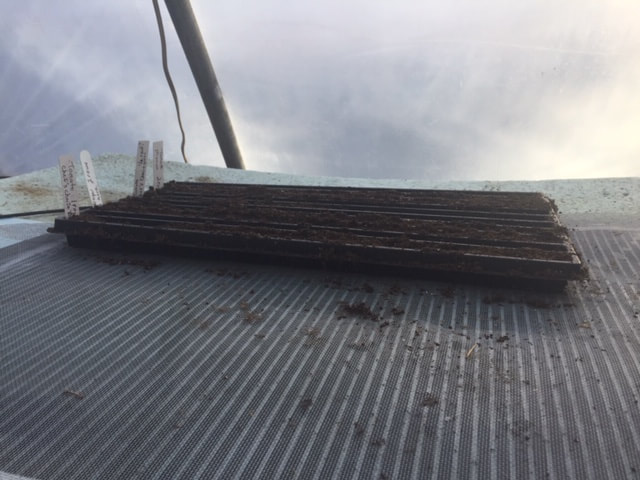
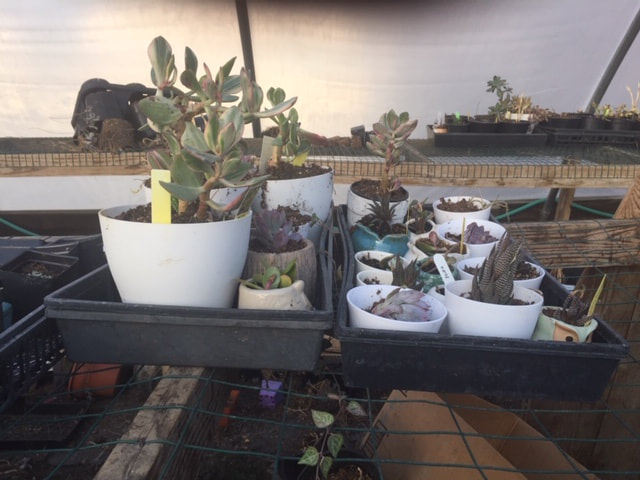
Diary of Becky's Greenhouse Day 1 Here is some of the things I did yesterday. Playing in the dirt.2/27/2024 images from Becky's Greenhouse Good morning, still warm at 38 degrees at 7:30 AM, high today will be early at 50 and then the cold front moves in. It will be cold tonight and only a high tomorrow of 30 with wind blowing. YA I know we will complain, but it looks like then the next 7 days will be warming up. Stay safe, tonight, and tomorrow stay warm.
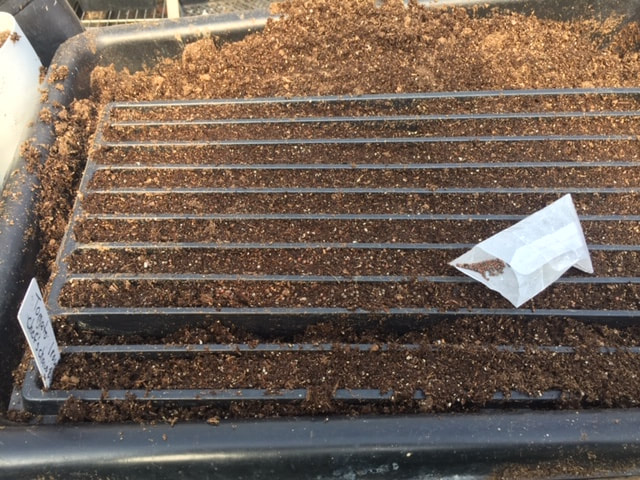
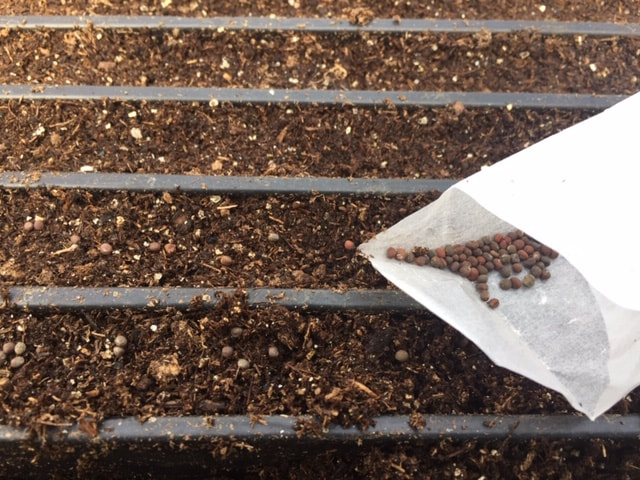
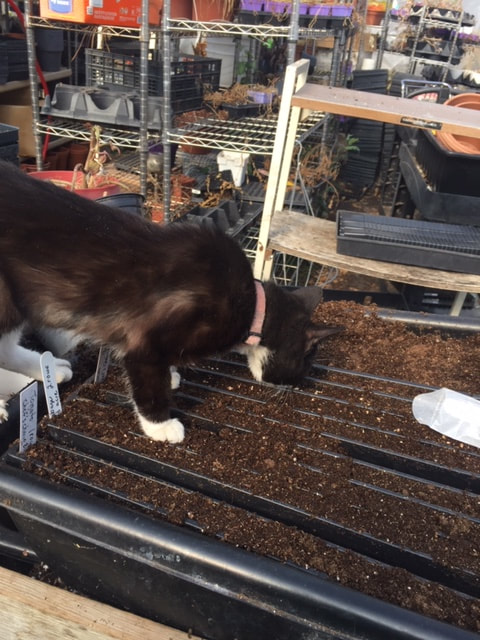
Today I am going to post pictures in a new series called “ Becky’s Greenhouse Diary.” I will show you in pictures what I did that day. This is from yesterday and it was 80 degrees in the greenhouse sun shining and all the doors open. What a lovely day to be working there. I planted seeds and you can see with some good help. This is the growing pad that I put the seeds on to germinate. It does help with that. I am cleaning up succulents and repotting them. You will see the finished succulents and how nice they look. I didn’t or couldn’t take a picture of me watering but that was done also. Here we go, the start of another season at Becky’s Greenhouse. It is our 35th year of growing and selling plants. I have to say we have never had it this warm in Feb. before so it will be interesting how spring comes out. I just know we need rain. Till next time this is Becky Litterer, Becky’s Greenhouse, Dougherty Iowa [email protected] 641-794-3337 cell 641+-903-9365 image from publicdomainpictures.net Good morning. NOW this is Feb 26 and it is 10:00 AM and the temperature is already 49 degrees. Excuse me for a couple of minutes, I need to go open up all the doors in the greenhouse as it is warming up a lot. Be right back.
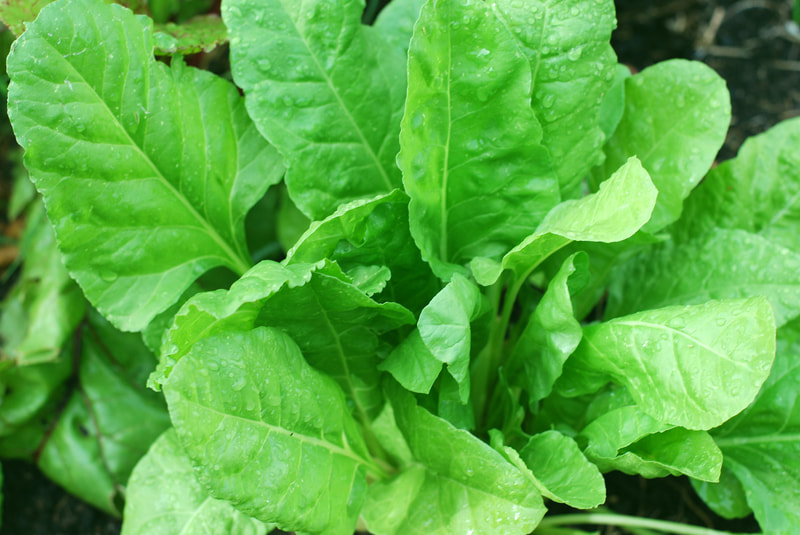
Greenhouse temperature was 85 degrees. South wind so that will run thru the doors and cool it down. Sun has some power in it for sure. That is what makes the plants grow. Stay safe. One easy vegetable to plant would be spinach here is how. Some guidelines to planting spinach..... Phenology, the study of signs, suggests planting spinach when crocuses are blooming. Similarly, in areas where lilacs grow, old-time farmers say to plant spinach when lilacs are in first leaf. Scatter spinach or lettuce seeds around emerging bulb foliage to make wise use of your garden space and have a leafy green crop at the ready to cover the bare spots left by deadheaded spring flowers. Planting, Growing, and Harvesting Spinach by Catherine Boeckmann Spinach, a super–cold-hardy leafy green, is a popular crop that thrives in fall and even winter in some areas. It can also be planted in very early spring. Learn more about planting, growing, and harvesting nutritious spinach in your home garden. About Spinach Spinach has similar cool-season growing conditions and requirements as lettuce, but it is more versatile in both its nutrition and its ability to be eaten raw or cooked. It is higher in iron, calcium, and vitamins than most cultivated greens and is one of the best sources of vitamins A, B, and C. PLANTING Spinach tolerates full sun to light shade; prepare soil about a week before planting by mixing in compost. Alternatively, prepare the soil in late summer or early fall, when spinach can also be sown where winters are mild. When to Plant Spinach Spinach requires 6 weeks of cool weather from seeding to harvest; this generally spring or fall, though many gardeners have better luck in the fall. Although seeds can be started indoors, it is not recommended, as seedlings are difficult to transplant. In the fall, sow seeds when the soil is 70°F or cooler. See our fall planting calendar. Many gardeners can grow spinach throughout the winter if they protect the young plants with a cold frame or thick mulch, then remove the protection when soil temperature in your area reaches 40ºF in spring. Remove the mulch to harvest some spinach, then replace the mulch. If planting in the early spring, sow seeds as soon as the ground warms to 40°F. (Cover the soil with black plastic to speed its warming.) To distract leaf miners, sow spinach seeds and radish seeds in alternate rows. Leaf miner damage to radish tops does not affect their root growth. Common spinach cannot grow in midsummer as it’s not cool enough. (For a summer harvest, try New Zealand Spinach or Malabar Spinach, two similar leafy greens that are more heat tolerant.) How to Plant Spinach Sow seeds 1/2 of an inch deep every 2 inches and cover with 1/2 inch of soil. Plant in rows 12 to 18 inches apart or sprinkle over a wide row or bed. Sow every couple of weeks during early spring for a continuous harvest. GROWING Water spinach to keep soil constantly moist. Use row covers to maintain cool soil and deter pests. When seedlings sprout to about 2 inches, thin them to 3-4 inches apart. You can eat the thinnings. Beyond thinning, no cultivation is necessary. Roots are shallow and easily damaged. Water regularly and mulch to retain moisture. When plants reach one-third of their growth, side-dress with a high-nitrogen fertilizer, as needed. Nutrient deficiencies may appear as yellow or pale leaves, stunted or distorted growth, a purpling or bronzing of leaves, leaves dropping early, or other symptoms. In early spring and late fall: Spinach can tolerate the cold; it can survive a frost and temps down to 15ºF (-9°C). (See local frost dates) Young spinach is more tender; cover if cold temps are in the forecast. RECOMMENDED VARIETIES There are four main types of spinach suited for spring and fall plantings. Baby-leaf style spinach is tender, with small-size leaves. The variety ‘Baby’s Leaf’ is good for containers; ‘Catalina’ is heat-tolerant and resistant to downy mildew. Savoy spinach has curly, crinkled, dark-green leaves, e.g. ‘Bloomsdale.’ The ‘Winter Bloomsdale’ variety is a crinkled-leaf, fall variety, tolerant to mosaic viruses. Semi-Savoy has slightly crinkled leaves and can be difficult to seed. ‘Melody’ is resistant to cucumber mosaic virus and downy mildew; mildew-resistant ‘Remington’ will grow in spring, summer, or fall; ‘Tyee’ can be planted in spring or fall, and is resistant to downy mildew. Smooth- or flat-leaf (also called plain leaf) varieties have spade-shape leaves. ‘Giant Nobel’ is a plain leaf variety and an heirloom that is slow to bolt; ‘Nordic IV’ is bolt-resistant. Malabar Spinach (Basella alba), a vine, and New Zealand Spinach (Tetragonia tetragonioides), a perennial, are two heat-tolerant leafy greens that resemble common spinach; both are heat-tolerant. Grow them in the summer, when common spinach can’t take the heat. HARVESTING Harvest a few outer leaves from each plant (so that inner leaves can develop) when leaves reach the desired size, or harvest the entire plant, cutting the stem at the base. Don’t wait too long to harvest or wait for larger leaves. Bitterness will set in quickly after maturity. Be aware of day length and heat: Increasing daylight (about 14 hours or longer) and warmer seasonal temperatures can cause spinach to bolt (develop a large stalk with narrower leaves and buds/flowers/seeds), which makes the leaf taste bitter. If spinach starts to bolt, pull the plant and use the leaves. Or try to slow the bolting: Pinch off the flower/seed heads, keep the soil moist, and provide shade. How to Store Spinach Fresh spinach leaves are good for up to a week. Too much moisture hastens its demise. So store fresh spinach unwashed and don’t wash until ready to use. Pat dry with a paper towel and put in a freezer bag with the towel to absorb moisture. Given its short shelf life, spinach is perfect for freezing. Wash, trim off ends and yellowing leaves, blanch, and pack into freezer bags. See how to freeze spinach. WIT AND WISDOM Phenology, the study of signs, suggests planting spinach when crocuses are blooming. Similarly, in areas where lilacs grow, old-time farmers say to plant spinach when lilacs are in first leaf. Scatter spinach or lettuce seeds around emerging bulb foliage to make wise use of your garden space, and have a leafy green crop at the ready to cover the bare spots left by deadheaded spring flowers. Taken from https://www.almanac.com/plant/spinach Till next time this is Becky Litterer, Becky’s Greenhouse, Dougherty, Iowa [email protected] 641-794-3337 cell 641-903-9365 image from publicdomianpictures.net Good morning, and it is 46 degrees with a clear blue sky in Dougherty at 11:00 AM. Going to warm up to 46 degrees, so we are at our high all ready. Cold front moving in this afternoon. Low tonight 19. Stay warm, stay safe.
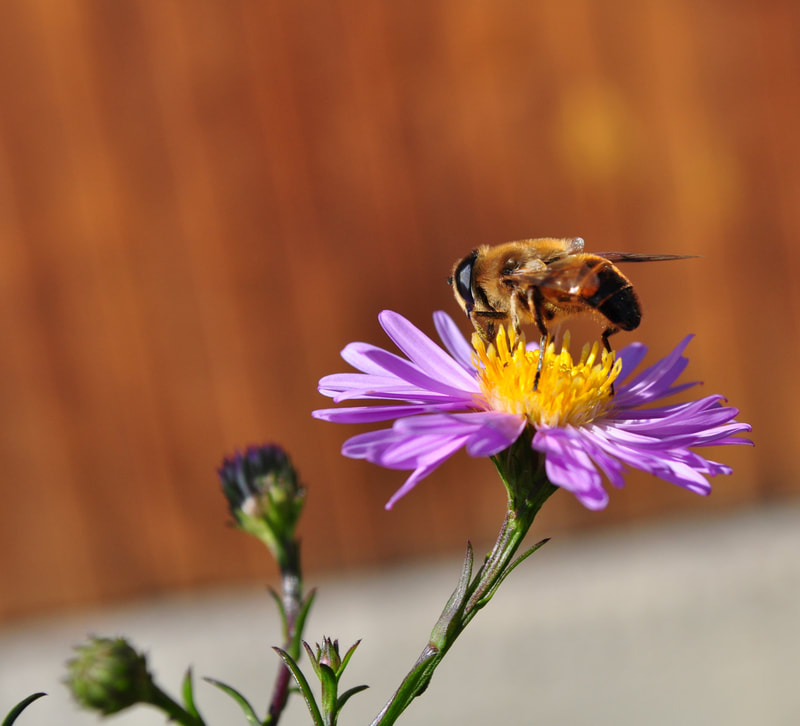
We are fortunate to have beehive here from our son and granddaughter business “Storybook Honey” Josh said, “Mom you need to grow more flowers for the bees for the fall. “ I have plenty here with the racks of flowers at Becky’s Greenhouse. I will be planting more of the fall blooming plants. I need to look up a chart to show these to grow for the bees. OR make one maybe…in my spare time. How about you? Give these a try. Which flowers do bees like best? By Robin Sweetser Ever dealt with the frustration of seeing blossoms fall off your vegetable plants because they have not been pollinated? Attract native bees! Here’s our list of flowers which are packed with the nectar, food, and pollen that these pollinating bees are after. Without our pollinating bees, most vegetables wouldn’t grow and flowering plants wouldn’t survive. Bees are important to our whole ecosystem. Further, the bee population is at risk due to overuse of pesticides so it’s important to not only plant flowers that bees need the most, but to also never treat them with pesticides. Sunflowers are packed with pollen—plus, their broad, semi-flat petals are an easy resting place for bees. See how to grow sunflowers. Native Bees Are Pollinating Powerhouses Most of the pollination is carried out by native pollinators—including flies, beetles, moths, and butterflies—but native bees are the unsung heroes. (Note: Honeybees are non-natives and not as important for widespread pollination.) How to Start a Flower Garden There are over 4,000 species of bees native to North America, ranging from the world’s smallest bee—the 2mm (.08”) long fairy bee (Perdita minima)—found only in the desert southwest, to the large carpenter bees that reach 40mm (1.6”) long. No matter their size, all native bees rely on blooming plants for sugary nectar and protein-packed pollen to feed themselves and their offspring. A big carpenter bee can muscle his way into flowers like this sweet pea. To keep bees well supplied with the nourishment they need, we need to have flowers in bloom all season long. To offer something for everyone, grow a variety of shapes and sizes. Choosing Flowers for Bees Bees prefer some types of flowers over others for several reasons. Generally, it comes down to the shape and color of the flower. Here are some things to keep in mind when you’re planning to plant flowers for bees: A bee’s flower preference depends on the length of its tongue! Some bees have long tongues that can easily access nectar in tubular-shaped blossoms like penstemon, columbine, and honeysuckle, while those with short tongues go for daisies, asters, and sunflowers. Small bees like small florets and composite flowers, while big bumblebees and carpenters like larger flowers. Try to plant a mix of different flower shapes and sizes to attract a variety of bee species to your space. Flower color matters. Bees can’t see red, which is a color more attractive to hummingbirds and butterflies. Bees are drawn to purple, blue, white, and yellow. Pollinators generally prefer native plants over non-natives since they have co-evolved together. Natives are usually low-maintenance plants, adapted to your region and easy to find for sale. Species plants have an advantage over cultivars when it comes to attracting pollinators and giving them what they need. Research has found that fancy forms of native plants—sometimes called “nativars”—are not as attractive or useful to the bees as the original species of the plants. You may have found this out yourself if you planted one of those fancy coneflower varieties. Hydrangea ‘Annabelle’ is the same genus and species as native smooth hydrangea (H. arborescens), yet it draws far fewer pollinators. Why? Many cultivars have lost the fragrance, pollen, nectar, and flower shapes that pollinators need. A hybridized plant that was bred to be sterile or contain no nectar will not benefit a pollinator at all. Also avoid planting double-flowering varieties. They have less pollen and it can be harder for the bees to access it with extra petals in the way. Stick close to the original flower form instead of going fancy and the bees will thank you for it. Borage is an edible annual herb and also a great companion, deterring bad bugs away while attracting bees. Which Flowers Are Best for Bees? Perennials offer the highest quality nectar and pollen but there are exceptions. Some bees are specialists, like the squash bee that prefers only squash, pumpkin, and gourd blossoms. The most effective pollinators are the generalists that get their food from a wide range of plants. This includes not only native trees and perennials but some non-natives like crimson and white clovers and annuals as well. Annuals have the advantage of blossoming all season long. Bees flock to alyssum, cleome, zinnias, sunflowers, salvia, calendula, and verbena. Your culinary herbs such as sage, thyme, borage, lavender, chives, dill, basil, oregano, rosemary, and mint can do double duty. Plant them throughout the vegetable garden, let some of them flower, and they will draw in the pollinators to your other plants. Lavender is an aromatic perennial herb that flowers all summer-long. And it’s edible! Early-Season Flowers for Bees The eternal struggle for bees in temperate zones is finding enough food in late winter and early spring, when most of nature is still sleeping! Here’s what we can plant to help them out: Some early blooming trees and shrubs to consider are vernal witch hazel, maples, willows, serviceberry, and redbud. They flower when not much else is in bloom yet. Early blooming fruits including cherry, plum, raspberry, blackberry, and blueberries. Spring-flowering bulbs are also popular with early awakening bees. Some spring perennials to grow include golden alexanders, larkspur, dianthus, wild columbine, ajuga, lupine, baptisia, and pulmonaria. Calendula (also called pot marigold) is an early bloomer which is very important bee forage! Mid-Season Flowers for Bees Mid-season flowers such as anise hyssop, black-eyed Susans, coneflowers, catmint, cleome, penstemon, globe thistle, milkweed, monarda (bee balm), coreopsis, daisies, phlox, gaillardia, and yarrow are bee magnets. Cleome, or “spider flower,” are beloved by pollinators and produce a long season of blooms. Bee balm is a great flower for pollinators. Bee balm” is an apt name of this flower, which is native to North America. Bees love it! Yarrow has an easy landing pad which makes it easy for pollinators to take a rest! Late-Season Flowers for Bees Bees are active until the weather cools down in late fall and still need to feed. Grow some late bloomers like dahlias, asters, ironweed, goldenrod, Joe Pye weed, rudbeckias, and helianthus to keep the party going. Bumblebees love bottle gentian, too! New England asters offer pollen and nectar into fall. Creating a Bee-Friendly Habitat Native bees need more than pretty flowers to survive. We need to provide water, shelter, and nesting sites. Banish pesticides and other poisons from your yard. When shopping for plants, look for chemical-free ones. Systemic insecticides can make the whole plant toxic—nectar and pollen included! Taken from https://www.almanac.com/best-flowers-bees Till next time this is Becky Litterer, Becky’s Greenhouse, Dougherty Iowa [email protected] 641-794-3337 cell 641-903-9365 Question for you to answer. Do you think we will have anymore winter this season? Yes or no2/22/2024 image from photos-public-domain.com Good morning I can’t believe it at 11:00 AM temperature is 53 degrees. I will have all the doors open today at the greenhouse.
The question today, and I would like you to respond. Do you think we will get any more winter weather? One answer I heard yesterday, no more winter weather for this season but that is more hopeful than what I think will happen. Just answer yes or no. Thanks… Till next time this is Becky Litterer, Becky’s Greenhouse, Dougherty Iowa [email protected] 641-794-3337 cell 641-903-9365 image from Modernfarmer I just can’t believe this temperature…28 degrees at 7:30 AM. High today in the 50’s. Yes, it feels like spring. What do you think will we have another bit of winter?
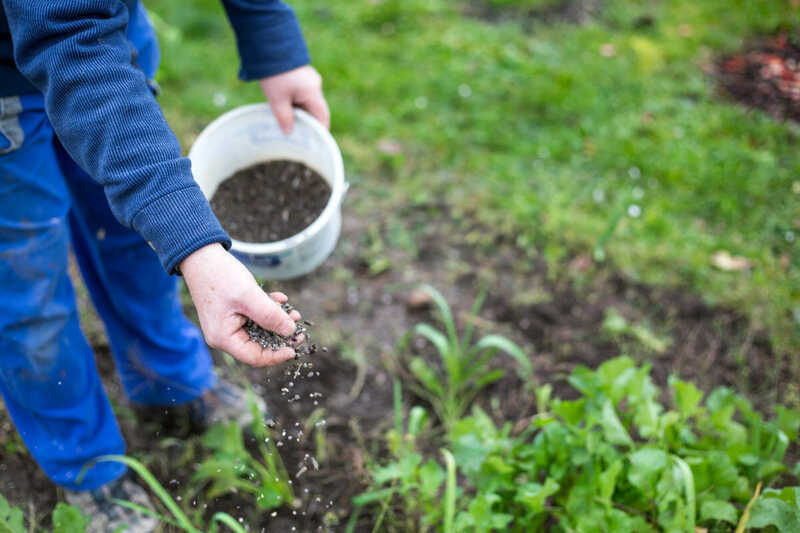
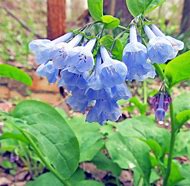
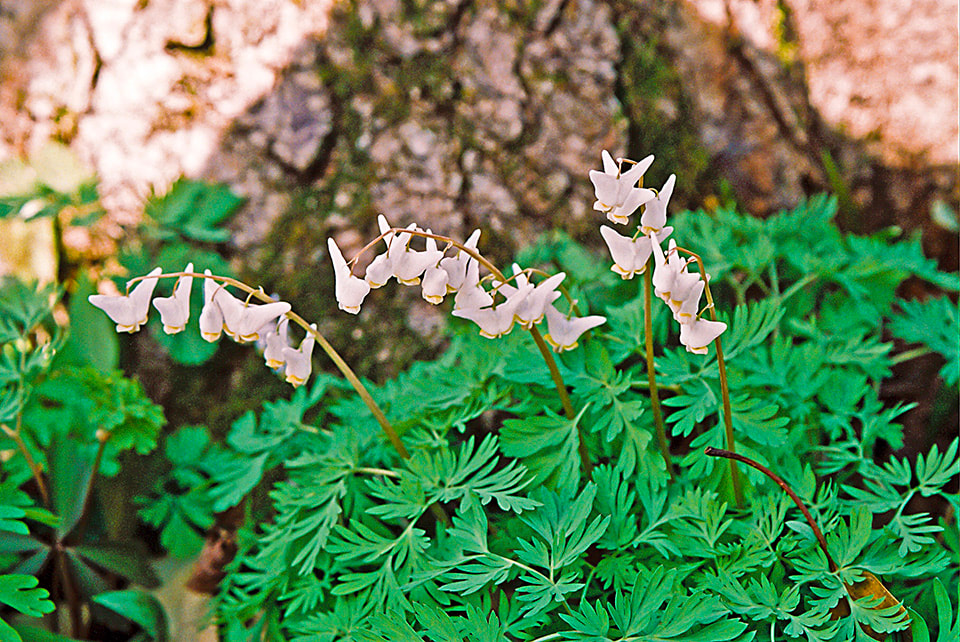
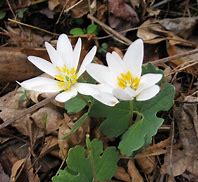
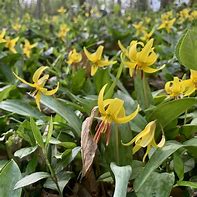
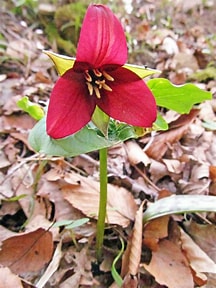
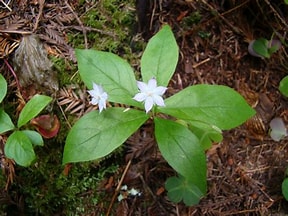
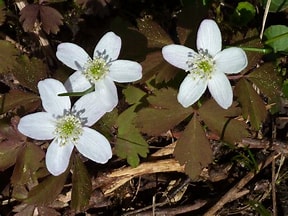
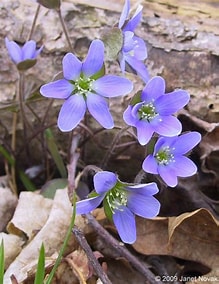
When should I fertilize my vegetable garden? I was just asked this. This is what I found out. Learn All About Using Fertilizer in the Garden by Catherine Boeckmann We use fertilizer to make our plants grow better, but when is the best time to apply fertilizer? And how much of what kind of fertilizer do we apply? In one page, we’ll cover everything you need to know about using fertilizers in your garden. What Is Fertilizer? As well as having soil that’s rich in organic matter (compost!), plants often need an application of fertilizer to get the nutrients that they need. Think of fertilizers as nutritional supplements. For example, tomatoes need to grow in soil that has plenty of calcium. If you’ve grown and harvested plants in your garden in the past, these crops take up the nutrients from the soil, and those nutrients should be replaced in the spring before more plants are grown there. This is where fertilizer (organic or processed) plays a role. Fertilizers replace lost nutrients, which ensures that soil nutrient levels are at an acceptable level for healthy growth. How to Test Your Garden Soil (And 3 DIY Tests) If you are a brand-new gardener, the ideal first step is to get a basic soil test in the autumn to see what kind and amount of fertilizer to apply to get to a “basic fertility” level. (See more about testing below.) We recognize that not every gardener takes the time to do a soil test, but we recommend it; you may even find that the fertility level of your garden is already adequate. Apply fertilizer with caution, though: The only thing worse than starving a plant of nutrients is to overfertilize it accidentally. Plants use only the nutrients that they need. Absorbing more than necessary can result in abnormal growth or adverse effects. When to Fertilize Your Garden For edible crops, fertilizer is usually applied in the spring and mixed into the garden soil before planting. If you’ve already sown your seeds or planted seedlings, you can still gently work in granular fertilizer (not liquid fertilizer, which can burn young roots) around the plants. It need not be worked deeply into the soil—the upper 3 to 5 inches will do. Then, water in the fertilizer. For perennial flowering plants, fertilize before growth begins in the spring. Wait until the ground is no longer frozen and the date of your last frost is only a week or so away. This ensures that there is less of a chance of the tender new growth brought about by the fertilizer getting immediately killed by frost. While a spring application is a good general rule, understand that what plants really need is help when they are growing the most. This occurs earlier for spring plantings of lettuce, arugula, kale, and other leafy greens. Rapid growth occurs in midsummer for corn and squash. So, for a long-season crop such as corn, many gardeners apply a small amount of fertilizer as a starter at the time of seeding and then also add a larger amount in early summer, just before the period of rapid foliar growth. Tomatoes and potatoes will need extra fertilizer mid-season as the plants take up and use existing nutrients. When tomatoes start producing flowers, switch to a low-nitrogen fertilizer in order to encourage more flowers and fruit rather than foliage. For perennial plants, the timing depends on the plant’s growth cycle. Blueberries, for example, benefit when fertilizer is applied early in the season at bud break, while June-bearing strawberries benefit most when fertilized after the harvest. Ornamental trees, shrubs, and perennials are often fertilized at the beginning of their growing season, as dormancy breaks. Always Take a Soil Test! The only way to truly determine the level of nutrients in your soil is a “soil test.” Testing in autumn will give you plenty of time to receive the results. Soil tests are usually available for free or low-cost from your local cooperative extension. You will not need to do this every year. The goal is to understand your soil, build it up, and then simply apply fertilizer to the soil every year to maintain the basic fertility level. You may even find that if your garden has been fertilized for years, you have high levels of nutrients. You do not want to add nutrients to your soil if it’s already available in high amounts; this may actually inhibit your plants’ growth. How Much of What Kind of Fertilizer Should I Use? A fertilizer bag will be labeled with a combination of numbers such as 3-4-4 or 8-24-8, or 12-12-12. These three numbers refer to the three most important nutrients plants need: Nitrogen (N), Phosphorus (P), and Potassium (K). The numbers refer to the percentage of weight of each nutrient in the bag. If you add up the numbers, they are the percentage of the bag’s total weight (the rest is simply filler to make it easy to apply). There may also be other nutrients, including calcium, magnesium, iron, and manganese. To start your garden, use a general vegetable fertilizer. For vegetables, we use herb and vegetable plant food with a 3-4-4 number. For tomatoes, we use a separate fertilize with a 3-4-6 ration which also contains calcium to help prevent blossom-end rot. Phosphorous is important because this is what’s needed for root development and growth. Potassium strengthens plants’ abilities to resist disease. Note the nitrogen (first number) is lower. Ever seen tomato plants that have lush leaves but no flowers or fruit? That’s due to too much nitrogen, which encourages leafy growth. Vegetable crops require most of their nitrogen after they have made considerable growth or have already begun to fruit. Having too much nitrogen before this time delays maturity and reduces flowering and yields. Your plants will also get nitrogen from the breakdown of organic matter in your soil. Later in the season, some plants benefit from nitrogen side dressings (sprinkled in the middle of rows). The demand of the plant for nitrogen often exceeds that supplied by the first two, and a nitrogen side-dressing is needed. But it depends on the vegetable. Cabbage, cauliflower, and broccoli can benefit from more fertilizer three weeks after transplanting. Peas, beans, cucumbers, and muskmelons can benefit after blossoming begins. Peppers, eggplants, and tomatoes benefit after first fruit sets and tomatoes could use more about two weeks after picking your first tomato, and then again a month later. Sweet corn can benefit when plants are 8 to 10 inches tall and then one week after tassels appear. Spinach, kale, mustard, and turnip greens can benefit when plants are about one-third grown. These vegetables should NOT have added nitrogen: sweet potatoes, watermelons, carrots, beets, turnips, parsnips, lettuce. The fertilizer bag should tell you the amount to use per 1,000 square feet of garden area. You can always ask the nursery staff for help translating to your garden space. Processed vs. Organic Fertilizers The fertilizer guidelines apply to both processed or organic fertilizers. Processed fertilizers (also called “synthetic” or “chemical” fertilizers) are manufactured from natural ingredients such as phosphate rock (P) and sodium chloride (NaCl) and potassium chloride (KCl) salts, but these are refined to be made more concentrated. Most (but not all) processed fertilizers are quick-release in a water-soluble form to deliver nutrients quickly to the plant, which can be useful in some situations. (There are some processed fertilizers that are coated to slow down the release.) Organic fertilizers are materials derived from plants that slowly release nutrients as the micro-organisms in the soil break down. Often applied in granular form (spread over the soil), most organic nutrients are slow-release, adding organic material to the soil so that you don’t need to apply it nearly as often. (Plus, they don’t leach into and pollute waterways, as do many of the synthetic, water-soluble fertilizers, which plants can’t fully absorb.) While most organic fertilizers are slow-release products, some release a portion of their nutrients quickly (examples are animal manure, biosolids, and fish emulsion). Chemically, the nutrients for processed and organic fertilizers are the same. Ideally, slow is the way to go. Slow-release granular fertilizers meter out nutrients in a controlled, “digestible,” and safe manner, as opposed to fast-acting, synthetic, water-soluble fertilizers, which are, in essence, an overdose. In terms of cost: While organic fertilizers can be more expensive upfront than processed fertilizers, they are often still economical for small gardens. Plus, you don’t need to apply as often. When you add the long-term benefits to your soil, organic outweighs processed. How to Apply Granular Fertilizers For that first “starter” fertilizer application of the season, apply granular fertilizers by broadcasting them either by hand or with a spreader over a large area. Or, if you’ve already planted, side-dress the fertilizer alongside your rows. All dry fertilizers should be worked or watered into the top 3 to 5 inches of soil with hoe or spade work after being applied to help the fertilizer leach down toward the plants’ root zones. If your plants are already growing, cultivate them gently so that you do not damage any roots. During the growing season, lighter supplemental applications can be made to the top inch of soil in crop rows and perennial beds and around the drip lines of trees or shrubs. (Read the label to find out how often applications should be made.) In general, applying granular fertilizers just before a good rain can be beneficial, as it aids in working the fertilizer down into the soil where roots can access it. How to Apply Liquid Fertilizers All water-soluble fertilizers are applied by dissolving the product in irrigation water and then applying it to the leaves of the plant and the soil around the plant. Warning: Do not apply liquid fertilizer at the same time that you plant! No matter how carefully you remove plants from their containers and place them in the ground, some root hairs will break. The fertilizer will reach the roots immediately and enter them at the broken points, potentially “burning” them and causing further die-back. Many gardeners wait 2 to 3 weeks after planting before fertilizing with liquid solutions; by then, the newly set-out plants should have recovered from any root damage. It is important to water plants thoroughly with plain water before applying the liquid fertilizer to avoid burning the roots if the soil is dry. Also, take care that the fertilizer is indeed diluted based on instructions, or you could burn the leaves. If you have a watering system, you can use an injector device to run the fertilizer through the system. In the case of liquid sprays, it is best to apply them on dry days in either the early morning or the early evening, when the leaves will have time to absorb the material. Avoid extremely hot days when foliage is subject to burning. Taken from https://www.almanac.com/how-fertilize-your-vegetable-garden Till next time this is Becky Litterer, Becky’s Greenhouse, Dougherty Iowa [email protected] 641-794-3337 cell 641-903-9365 spring beauty image from Pinterest. Bluebells image from Pinterest Dutchmen Britches image form Minnesotaseasons.com Bloodroot image from blogspot.com trout lily image form Pinterest red Trillium image from Pinterest star flower image from leaves of plants.blogspot.com wood anemone image from Pinterest Hepatica image from Pinterest toothwort image from Pinterest WOW it is warm out all ready. 33 degrees at 9:00 Am with a clear, blue sky. High today of high 50’s. UNBELIEVEABLE. Looks like for the next 7 days warm Normal low is 18 degrees, high of 34 degrees. We will see if this continues or we will have more seasonable temperatures.
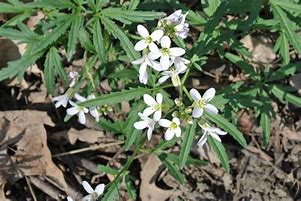
I almost don’t want to post this writing about early spring wildflowers. I am hoping they don’t start to come out because we might get some more cold weather. But here they are. Have you been in the woods in the spring and found these? My growing up years, we would go to Uncle Ted’s and look for these wildflowers in his woods. His land was on the bluffs by Lansing and the Mississippi River. Very fond memories… Common Spring-Flowering Ephemerals by Robin Sweetser Go for a walk in the woods to see the first wildflowers! Called “spring ephemerals,” these tiny flowers emerge in early spring and disappear when the tree canopies fill out! They have descriptive names: trillium, bloodroot, Dutchman’s breeches, and Virginia bluebells, to name a few. A sure sign of spring in my area is when the bloodroot blooms. Like other spring-blooming ephemerals, this tiny wildflower makes use of the short time before trees leaf out and block the sun on the woodland ground. They fit most of their above-ground life into a few weeks in April and May, then fade away until next spring. What are Spring Ephemerals? We call these early wildflowers “ephemerals” because most, if not all, of their growth dies back when it starts to get warm. They are perennials which grow from underground corms or rhizomes. They can put on such an early show because they have stored food in their bulbs from the previous year’s growth. Don’t let their small, delicate appearance fool you. These lovely wildflowers are tough. They are perfectly adapted to the harsh growing conditions of early spring, utilizing the high levels of moisture and nutrients in the soil of deciduous forests at this time of year. Moist soil helps moderate the extreme difference between day and night temperatures and by growing low to the ground, they are out of the range of cold, drying winds. Spring-blooming ephemerals bloom for only a few precious weeks; they need to complete most of their life cycle in the early spring before the trees, shrubs, and plants leaf out and take the available light. Since there are not too many flying insects active this early in the spring, many ephemerals are pollinated by specialized beetles or ants. Others have evolved to look or smell like rotting meat to attract any flesh-eating flies that might be out early. Ants not only pollinate some of the plants but also disseminate the seeds. 10 Common Spring-Flowering Ephemerals When you are walking in the woods keep an eye out for some of these delightfully delicate wildflowers and assume the proper attitude of reverence by getting down to their level to observe them up close and personal. 1. Virginia Bluebells (Mertensia virginica) is a gorgeous native wildflower found in moist woodlands and river flood plains. This ephemeral perennial plant comes up early in the spring. Purplish pink buds open to sky blue flowers with a delicate, sweet fragrance. The tubular flowers are beloved by pollinating bumblebees and other long-tongued bees but are visited as well as by several types of butterflies, moths, and hummingbirds. 2. Dutchman’s breeches (Dicentra cucullaria) look just like white pantaloons hanging upside-down to dry. They are also called soldier’s cap or butterfly banners and are related to bleeding hearts. The upside-down blossoms protect the pollen from wind and rain. Only the female bumblebees with her long tongue, can reach the nectar deep inside the long spurs and pollinate the flower in the process. 3. Bloodroot (Sanguinaria canadensis) has pure white flowers with leaves that wrap around the stem and bud, trapping warm air. Bloodroot gets its name from the red sap the leaves, stems, and roots exude when broken. The petals appear before the leaves unfurl and at night they close up to protect the center from rain or frost. 4. Eastern spring beauty (Claytonia virginica). The light pink Spring Beauties below have 5-petaled flowers with dark pink veins and long, succulent leaves. 5. Trout lily (Erythronium americanum) is the earliest blooming lily, bearing small yellow trumpets with recurved petals. The purple splotches on its leaves resemble the markings on a brook trout, giving it its name. 6. Red trillium (Trillium erectum) are all about threes. The plant has three heart-shaped leaves, three large red petals, and three green sepals. This has earned it the name trinity flower, but it goes by many common names including stinking Benjamin for its repulsive odor of rotting flesh meant to attract the flies that pollinate it and wake robin since it usually blooms around the time the robins return. 7. Starflower (Trientalis borealis) is a plant of sevens - seven leaves, seven petals, seven stamens, and even seven seeds in each capsule. These bright white flowers spread by underground runners and will form a nice carpet if undisturbed. 8. Wood anemones (Anemone quinquefolia) have a pliable stem that can survive strong winds. Its white blossoms have no nectar or scent and the plant is wind pollinated giving it the common name windflower. 9. Round-lobed hepatica (Anemone americana) is an early bloomer; its buds have hairs that act as insulation. It is easy to miss because its tiny flowers appear among last year’s withered leaves. The blossoms can be dark violet, white or a range of pastel colors including pink, lavender, and pale blue. Its flowers are self-fertile and don’t need an insect to pollinate them. 10. Cutleaf Toothwort (Cardamine concatenata) is one of the earlier spring wildflowers of moist forests and woods; the name refers to the tooth-like projections on the underground stems (actually leaf scars from the previous seasons growth). The leaves and rhizomes are edible (with a spicy flavor inspiring the common name of pepper root). Enjoy them in their natural surroundings. Never dig them up and try to transplant them into your own garden. Many species, like trout lilies, take upwards of 8 years to flower. Just enjoy a walk in the woods and the chance to see these wildflowers during the few short weeks that they flower. As the name “ephemeral” suggests, their beauty is fleeting. Taken from https://www.almanac.com/10-spring-ephemerals-first-wildflowers Till next time this is Becky Litterer, Becky’s Greenhouse, Dougherty, Iowa [email protected] 641-794-3337 cell 641-903-9365 image from familyhandyman.com Good morning, and it is a lovely morning. Temperature at 8:30 Am is at 26 degrees with a high today of 49. We have wispy clouds or cirrus clouds so will have more sunlight come thru. Enjoy. I will work in the office and house this morning, and then go out to the greenhouse this afternoon. I am sure it will be warm in there to work.
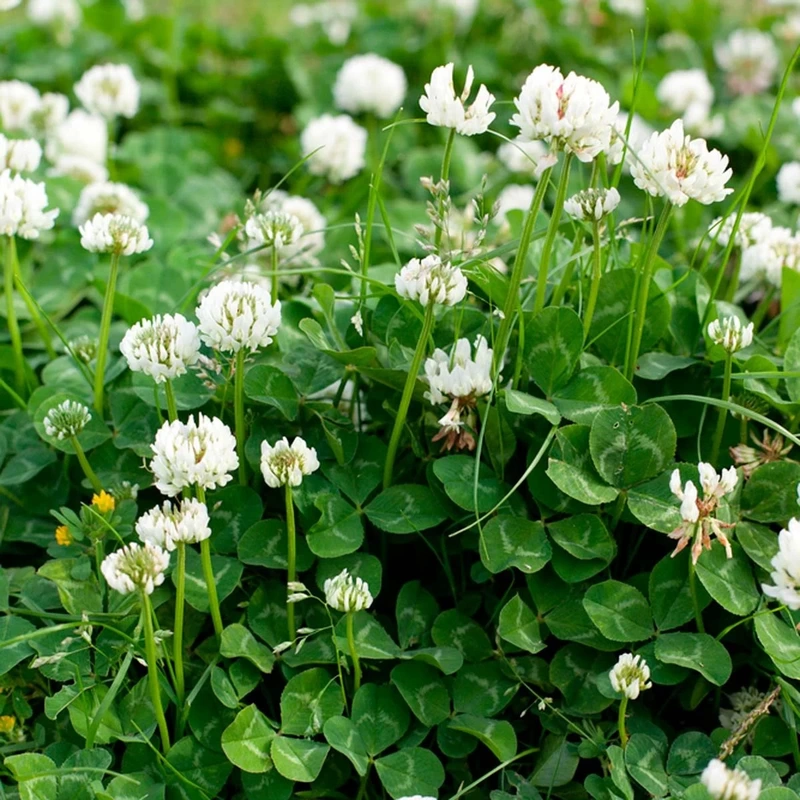
Do you have clover in your yard? I need to investigate getting some growing as we have some hives here from Storybook Honey. Here is what to do to have clover back in your yard. How and Why to Grow a Clover Lawn Clover Comeback: Learn All About the Benefits of White Clover by George and Becky Lohmiller At one time, most yards had at least some white clover growing in them. It was a world before chemicals, and clover was part of seed blends because it improved the soil—and the condition of the lawn. Gardeners are beginning to recognize the benefits of clover in lawn grass mixtures—or even as a replacement for grass. Move on from the quest for a perfect lawn of just turf grass. It’s not natural and ends up requiring chemicals. Before World War II and the advent of chemicals, clover was used as a great companion with turf grass. It was added to seed blends, along with fescues, ryegrasses, and Kentucky bluegrass, because it helped grass thrive. Benefits of Clover Being a legume, the clover plant fixes poor soil! Clover has the ability to convert nitrogen into fertilizer using bacteria in its root system, practically eliminating the need for additional fertilization. White clover (Trifolium repens) is the most common clover for lawns. Left uncut, white clover grows 4 to 8 inches tall and produces small white flowers that are often tinged with pink. It’s a rapid spreader that crowds out broadleaf weeds while growing harmoniously with grass. Like white clover, red clover (Trifolium pratense) is native to Europe, but has been naturalized in North America. It produces attractive purple flowers and typically grows taller than white clover (a little too tall compared to lawn grass). Clover is among the first plants to green up and thrive in the spring. It’s an extremely drought-resistant plant and will keep its cool-green color even during the hottest and driest parts of summer. Clover will also thrive in areas that are poorly drained or too shady for a conventional lawn. The flowers not only create a beautiful visual effect but also bring in bees, butterflies, and beneficial insects that prey on garden pests. Honeybees rarely sting when they are away from their hive, but if they make you uncomfortable or you are allergic to bee stings, simply have the lawn mowed more often when clover is in bloom. Or, grow clover on surfaces where there is little activity on the lawn, and the desired result is more aesthetic than functional. Planting Clover You can plant clover by itself for ground cover, but it stands up better to foot traffic when combined with lawn grass. Only 5 to 10% of the weight of tiny clover seed must be mixed with the recommended amount of grass seed to create a thick stand. When adding clover to an existing lawn, first mow it close and remove any thatch to allow the seed to fall to the soil surface. To sow clover alone, mix it with enough sand to facilitate spreading. About 2 ounces of clover is needed for every 1,000 square feet of lawn. Since clover has a low growth habit, it can go without mowing all season long if desired. Or, just mow a couple of times a year to maintain its appearance. Luck of the Clover Finding a four-leaf clover is considered good luck. Surely, it must be because, on average, there is only one of them for every 10,000 clovers with three leaves. But even if you never find a four-leaf specimen, just having clover growing in your lawn will keep it greener longer with minimum care, which we consider to be extremely good luck. Taken from https://www.almanac.com/clover-comeback Till next time this is Becky Litterer, Becky’s Greenhouse, Dougherty Iowa [email protected] 641-794-3337 cell 641-903-9365 image from wallpaper cave Good morning, blue clear sky this Saturday. But the big surprise is the temperature. It is 12 degrees now at 8:16 AM, but at 4:00 AM it was 7 degrees. I missed this temperature being this cold. We should have had the wood stove at the greenhouse going as the waste oil couldn’t keep up. It got cold but no damage. This week little plant plugs come in, so we are going to be watching it closely. Did you guys know it was going to be that cold? We do have wind, so the wind chill makes it feel are you ready for this -4. It is Feb. in Iowa. Stay warm, stay safe.
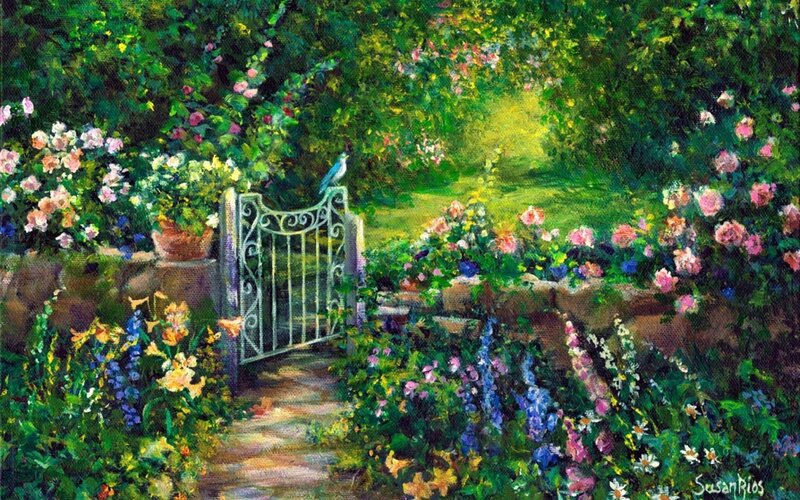
Everything I know I learned in My Garden by Emilie Barnes Begin early. But it’s never too late to start. If it doesn’t work, try something else. Life is fragile. Protect it. Life is enduring. Trust it. Life is daily. Water it. Weed it. Life is indescribably beautiful. Enjoy it and say thank you. Growth takes time. And while you’re waiting, pull a weed. There’s something for everybody-different blooms for different rooms. Pruning hurts. Pruning helps you grow. Sometimes the tiniest flowers smell the sweetest. To everything there is a season. But know what season you’re in. Dream big. But try not to let ambition turn your joy into drudgery. Grow what you love. The love will keep it growing. You reap what you sow. But there will be surprises. “The lesson I have thoroughly learnt, and wish to pass on to others, is to know the enduring happiness that the love of a garden give.” Gertrude Jekyll Till next time this is Becky Litterer, Becky’s Greenhouse, Dougherty Iowa [email protected] 641-794-3337 cell 641-903-9365 image from Quiet-corner.com Cold morning. The temperature is 20 degrees, cloudy sky and high today only in the 30’s. BUT this is more seasonable, it is ok.
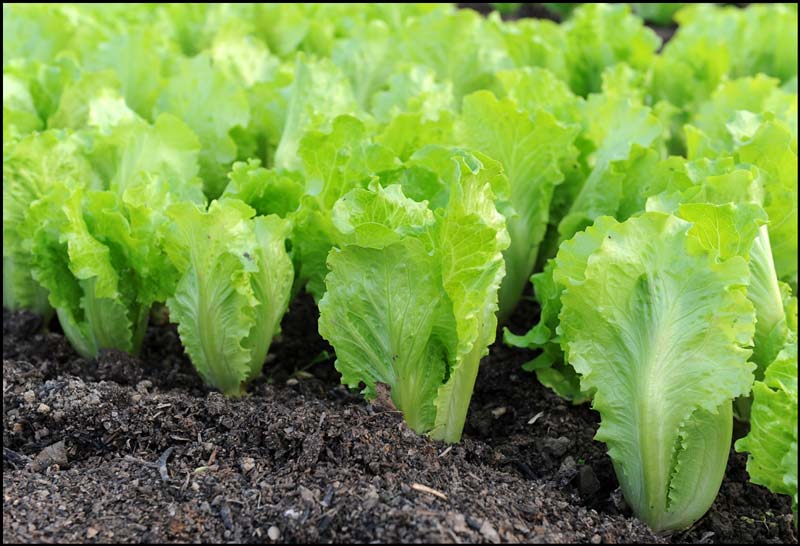
New food for thought…growing lettuce. Planting, Growing, and Harvesting Lettuce by Catherine Boeckmann If you haven’t tasted fresh, homegrown lettuce, you’re missing out. It’s far superior to the store-bought alternative in both taste and vitamin A content. We’ll show you how to sow, plant, care for, and harvest this versatile salad vegetable. Lettuce is quick-growing, fuss-free, and can be grown just about anywhere. Grown for its luscious leaves, there’s a cornucopia of both hearting and loose-leaf varieties to explore. About Lettuce Lettuce needs little introduction. Grown for its luscious leaves, there’s a cornucopia of both hearting and loose-leaf varieties to explore. Lettuces that form dense heads for harvesting whole include creamy butterhead types, upright romaine and cos lettuces, and the classic, crunchy iceberg. Looseleaf lettuces can be harvested whole or a few leaves at a time, ‘cut-and-come-again ’-style. Choose from the classic salad bowl lettuce, handsome oakleaf types, or any number of other colorful leaves that’ll brighten vegetable beds and ornamental borders alike. Lettuce is a cool-season crop growing well in most regions in the spring and fall. This crop is perfect for beginners; it’s easily sown by seed directly in the soil as soon as the ground can be worked. Because lettuce grows quickly, the best approach is to plant a small amount of seeds at a time, staggering the plantings. Lettuces are a great leafy green because they grow quickly, produce for a long time, and are not very demanding if you keep the plants sufficiently watered. Plus, lettuce grows great in raised beds, making it ideal for small spaces. Lettuces are perfect for containers, which can be placed on decks, patios, balconies, and porches. PLANTING Lettuce prefers a location with 5 to 6 hours of sun, but can benefit from afternoon shade when temperatures soar. Soil should be loose, well-draining, and moist but not soggy. In the weeks prior to planting, amend with plenty of compost for added fertility. Or grow lettuces in pots or tubs of potting soil. Lettuce prefers a bright, open position with good air circulation to promote strong, disease-free growth. Lettuce is a cool-season crop, so in hot climates, you may get better results growing it in a cooler, shadier spot, especially as the young plants start out. Either way, lettuces don’t take long to reach maturity, which makes them an excellent choice for growing in between slower-to-establish crops such as corn or leeks. When to Plant Lettuce Soil temperatures between 45°F and 65°F (7°C and 18°C) are ideal. Cold-adapted varieties can survive much lower temperatures. Make the earliest sowings under cover from late winter to grow on in greenhouse or hoop house beds for a super-early harvest. Then, from early spring, it’s time to sow for growing outside. Direct sowing is recommended. Sow seeds in the ground 2 to 4 weeks before your last spring frost date or as soon as the ground can be worked. Or, to get a head start, start seeds indoors about 1 month before your last spring frost date. Harden off seedlings for 3 days to a week before setting outdoors. If you are buying transplants (small plants) from a garden center or nursery, you may plant between 2 weeks before your last spring frost to 2 weeks after your last spring frost. In most regions, it’s possible to plant another crop of lettuce in the fall or even early winter. See our Planting Calendar for planting dates. Tip: To plant a fall crop, create cool soil in late August by moistening the ground and covering it with a bale of straw. A week later, the soil under the bale will be about 10°F (6°C) cooler than the rest of the garden. Sow a three-foot row of lettuce seeds every couple of weeks—rotate the straw bale around the garden. How to Plant Lettuce Sowings may be made directly into prepared soil or into module trays of multipurpose potting soil. To sow direct, remove any weeds then rake the soil level to a fine, crumbly texture. Mark out shallow drills, 8 to 12 inches or 20 to 30cm apart, using a stringline as a guide if this helps. Then sow the tiny seeds in clusters—a pinch of seeds every four inches or 10cm. Backfill the seed drills, label with the variety and water. Since the seed is so small, a well-tilled seedbed is essential. Stones and large clods of dirt will inhibit germination. Plant seeds 1/8 to 1/4 of an inch deep. Lettuce seeds need light to germinate, so don’t sow them too deep. Seeds may be sown in single rows or broadcast for wide row planting (loose-leaf varieties are best for this). When broadcasting, thin 1- to 2-inch tall seedlings for the proper spacing. Spacing between plants depends on the variety: Loose-leaf lettuce: Plant or thin to 4 inches apart. Romaine (cos) and butterhead (loose-head, Bibb, Boston) lettuce: Plant or thin to 8 inches apart. Crisphead (iceberg) lettuce: Plant or thin to 16 inches apart. Set rows of lettuce 12 to 15 inches apart. Sow additional seeds every 2 weeks for a continuous harvest. Consider planting rows of chives or garlic between your lettuce to control aphids. They act as “barrier plants” for the lettuce. Water thoroughly with a mist nozzle at time of transplanting or seeding. For a fall crop, cool the soil in August by moistening it and covering it with a bale of straw. One week later, the soil under the bale should be a few degrees cooler than the rest of the garden and ready to be sown with a 2-foot row of lettuce. Repeat the process every couple of weeks by rotating the straw bale around the garden. As autumn temperatures decline, seed as usual for a fall harvest. GROWING You can help transplants along at the start of the season by covering them with a temporary cloche made from bottomless milk cartons or plastic bottles. These will keep the chill off your seedlings just enough to help them acclimatize. Newly planted lettuces may also be helped with a simple row cover or fleece. Fertilize 3 weeks after transplanting with organic alfalfa meal or another slow-release fertilizer to provide a steady stream of nitrogen. Make sure the soil remains moist but not overly wet. It should drain well. Overwatering leads to disease or soft growth. Lettuce will tell you when it needs water. Just look at it. If the leaves are wilting, sprinkle them anytime, even in the heat of the day, to cool them off and slow down the transpiration rate. Using row covers can also help to keep lettuce from drying out in the sun. An organic mulch will help conserve moisture, suppress weeds, and keep soil temperatures cool throughout the warmer months. Weed by hand if necessary, but be careful of damaging your lettuce plants’ shallow roots. How to Delay Bolting Bolting is a common problem caused by warm temperatures (over 70°F/20°C) or changes in day length. When a lettuce plant bolts, it starts to produce a central stem and seed stalk, and leaves take on a bitter flavor. To delay bolting, cover plants with a shade cloth so that they get filtered light. Be sure to maintain watering throughout the warmest parts of the growing season, too. Planning your garden so that lettuce will be in the shade of taller plants, such as tomatoes or sweet corn, may reduce bolting in the heat of the summer. cold frame with lettuce Lettuce is a great candidate for cold-frame gardening! RECOMMENDED VARIETIES Some of our favorite varieties include: Crisphead: ’Great Lakes’, ‘Ithaca’, ‘King Crown’, ‘Mission’, ‘Summertime’ Romaine (Cos)/Butterhead: ’Burpee Bibb’, ‘Cosmo Savoy’, ‘Green Towers’, ‘Little Gem’, ‘Paris White Cos’, ‘Parris Island’, ‘Valmaine’ Loose-Leaf: ‘Black Seeded Simpson’, ‘Green Ice’, ‘Ibis’, ‘Lollo Rossa’, ‘Oak Leaf’, ‘Prizehead’, ‘Salad Bowl’, ‘Slobolt’ Red Leaf: ’New Red Fire’, ‘Red Sails’, ‘Ruby Red’ (Not recommended for hot weather areas; the red pigment absorbs more heat.) Taken from https://www.almanac.com/plant/lettuce Till next time this is Becky Litterer, Becky’s Greenhouse, Dougherty Iowa [email protected] 641-794-3337 cell 641-903-9365 |
AuthorHi! My name is Becky and I am a Master Gardener. I own Becky's Greenhouse in Dougherty, Iowa. Archives
March 2024
Categories |
|

 RSS Feed
