Greenhouse Tidbits ... Daily postings on my blog. check that out. Diary of greenhouse is going on now.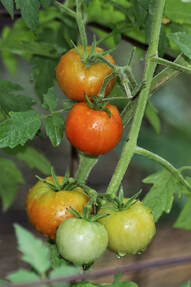
It's tomato harvest time! How to encourage ripening of tomatoes. Check out my latest blog!!
(image from publicdomainpictures.net) Where we started ...Becky's Greenhouse in 2023 will be starting the 34th year of growing, and over 37 years of selling plants. I am a Master Gardener since 2000 thru the Iowa State Extension service. Larry's Garage is our main stay business here in Dougherty. Larry opened up his garage in 1975 so he has been here for over 40 years. So personal I can grow, sell plants and also get you some tires. Interesting business we have. Upcoming articles I will give you the history of Becky's Greenhouse.
I record a radio show on Saturday mornings on KLMJ radio 104.9 at 7:20 a.m., and 5 Minutes of Gardening and You - We offer personal service to help with your gardening needs. Our goal is to get to know you and your garden. We would love to have you stop in at Becky's and see for yourself. Visit us at 80 South Main St., Dougherty, Iowa or call us at 641-794-3337. |
Hours of OperationMay - JuneMon - Sat 9:00 AM - 6:00 PM
Sundays 1:00 PM - 6:00 PM July - AprilMon - Fri 9:00 AM - 6:00 PM
Punch CardFor every $100.00 you spend you get $7.50 off. I honor the punch cards from year to year.
|


|