|
image from anglianagardener.co.uk Good morning…sun is visible with clear, blue skies. BUT it is only 22 degrees outside. Dress accordingly. When I walked on the yard, it is frozen, so this is good with the moisture we had.
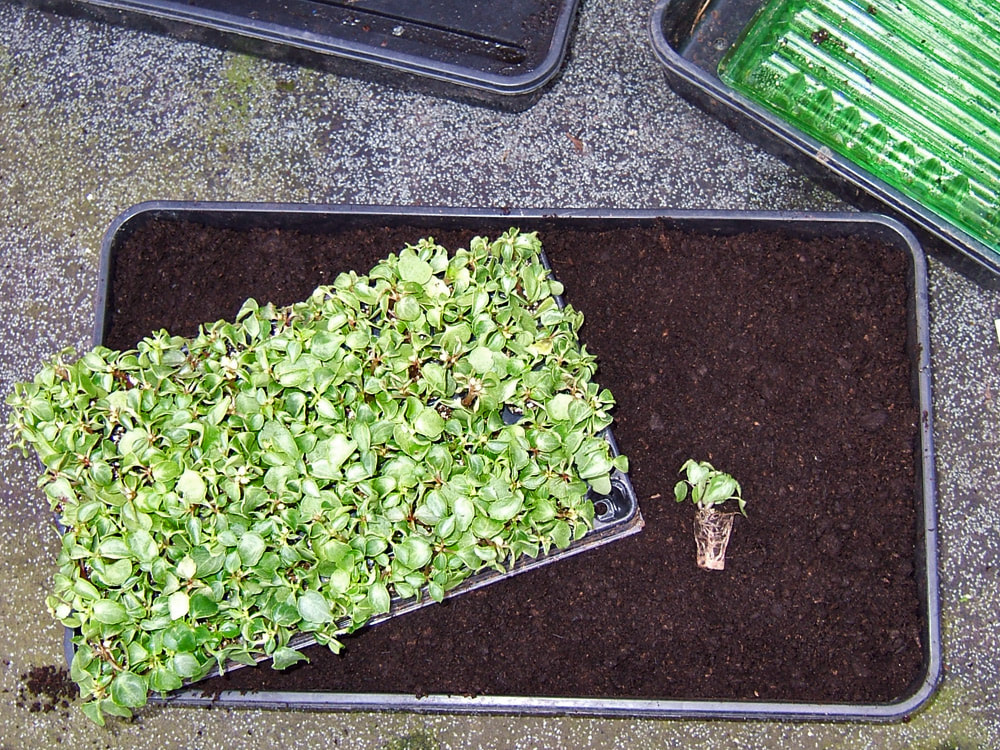
We just unloaded 2 trucks with boxes of plug trays. It is 11 boxes with 3 or 4 plug trays in each with each plug tray having 40, 144, 288 or 500 plants in each. YES, that is lots of plants. We are in full production of planting. In the morning, I need to make up planting sheets for each plug tray that is being planted that day. I can’t make them up in the winter because I don’t know what the freight charge will be. What size container to plant in? 1203, 1204, 804 regular, 804 deep, single pots, baskets, or quart pots? And I must find the place to put the trays to grow in the greenhouse after they have been planted, so that might mean moving planted trays to tall carts or cleaning off tables with stuff. We will need to find the containers and the trays that hold them for the planting that day. I need to water every day all we have planted, and you can imagine the amount of dirt in the small plugs, so the plug trays need water each day. I am planting seeds and working with succulents. The days go quickly with this planting time. But I do love it and watching the plants grow is just very fulfilling. I will post pictures later today on out day in the greenhouse. Stay warm, stay safe. Till next time this is Becky Litterer, Becky’s Greenhouse, Dougherty, Iowa [email protected] 641-794-3337 cell 641-903-9365
0 Comments
image from Pinterest Good morning. We are now having winter, but the much needed moisture is coming. Snow, rain, sleet and right now at 8:00 AM it is snowing. Moisture is soaking in as there is no frost. This is good.
I haven’t posted in the last few days. We have had family here from Wyoming. We had our family Easter, plus confirmation of a grandchild. World wind of family time and it all was good. Thankful for all of it. Now it is time to get back to the greenhouse. My list is long and I will keep working on it. Stay safe, and today it is going to have wind chills. STAY WARM. How do you keep Easter lilies alive after they bloom? By Robin Sweetser How do you keep Easter lilies alive after they bloom? Do Easter lilies multiply? Are Easter lilies poisonous to pets? Learn all about caring for Easter lilies! Learn all about the pure white Easter lily (Lilium longiflorum). The fragrance of an Easter lily is a sign that spring is here! But like most true lilies, if left to nature, they actually wouldn’t blossom until late summer. The potted plants for sale around the Easter holiday have been tricked into blooming for us at Easter by greenhouses that pot up the bulbs in the fall and treat them to a long cooling period—about 1,000 hours in cold but not freezing temperatures. After the lilies start to sprout, they are given enough warmth and light to get them growing and budding in time for holiday sales. This can be tricky for growers to time just right since the date for Easter can vary from late March to late April. How to Keep Your Easter Lily Growing After Easter If you have a fragrant Easter lily for the holiday and want to enjoy it for years to come, you will need to plant it outside. The bulbs are winter-hardy in zones 5 to 8, but the plants do not do well in hot, humid climates. To prepare the bulb for planting outdoors, let the flowers fade and keep watering until the leaves die back to the stem. Harden off the bulb by placing the plant outside each day for longer periods of time until it acclimates to being outdoors. After the last frost, plant it 4 to 6 inches deep in rich, well-drained soil where it will get full morning sun and some afternoon shade. Like clematis, these lilies like their heads in the sun but their feet in the shade. If you can’t shade the base of the plant, use mulch to keep the roots cool. Cut the stem off at the soil line and mark where you have planted. Fertilize it twice over the summer, and if you haven’t already mulched it, apply some mulch in the fall for winter protection. If all goes well, your bulb should bloom again the next summer. As the leaves mature, they will start to turn yellow. Make More Lilies! To make more lilies, dig up your bulbs and separate the small bulblets in the fall. Replant them 4 to 6 inches deep and 6 to 12 inches apart. It will take 2 to 3 years for them to reach a blossoming size, but it will be worth the wait when you have a whole row of them in bloom! They are not trouble-free, though. Deer love to eat the plants, especially the buds, and the lily leaf beetle can decimate an entire planting if not kept in check by vigilant hand-picking or spraying with neem oil or Spinosad. Scarlet lily leaf beetles might be small, but they are voracious chewers and will ruin your lilies if left unchecked. Beware: Easter Lilies Poisonous to Cats Finally, if you received an Easter lily as a gift, be aware that all parts of this plant are poisonous and especially toxic to cats. If they eat even a small amount, it could cause kidney failure and kill them, so if you suspect Fluffy has been chewing the leaves or licking the pollen, get her to the vet right away! Even though the plants are toxic, dogs and humans are not severely affected and would have to eat a large quantity of the plant to become sick. Taken from https://www.almanac.com/how-grow-and-care-easter-lillies Till next time this is Becky Litterer, Becky’s Greenhouse Dougherty Iowa [email protected] 641-794-3337 cell 641-903-9365 image from blog.cwf-fef.org Good morning, calm before the storm. Snow starts later after midnight and it is a clipper so out of here by 10:00 AM on Friday. Temperature is 27 at 8:00 AM high of 43 degrees low tonight of 28 degrees. Weather snow coming through the night and early Friday morning. Stay safe.
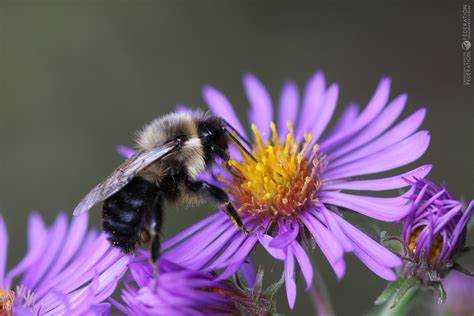
I need to sell lots of this perennial for flowering in the fall. I am going to plant them for one reason. HONEY BEES. They are looking for pollen and food in the fall, and this perennial will do it. So please, think about planting it for them. Planting, Growing, and Caring for Asters by Catherine Boeckmann Asters enliven the garden in late summer and early fall when many flower blooms are fading—providing a late-season treat for the monarch butterfly, too! Plant these deer-resistant native perennials in midspring to keep the color going. Learn all about planting, growing, and caring for asters. About Asters Cold-hardy perennials with daisy-like flowers, aster flowers are the pollinator stars of the garden from late summer through fall. Growing 1 to 6 feet tall, depending on variety, these upright flowering plants bear cheerful star-shaped flower heads ranging from purple to white to blue. Even though there are more than 600 aster species, the two most commonly encountered asters in home gardening are the New England aster (Symphyotrichum novae-angliae) and the New York aster (S. novi-belgii). Several years ago, the Aster genus was split into multiple genera. Aster now covers most European and Asian asters, while those native to North America belong to Symphyotrichum. Some hybrid varieties are available in showy colors, yet “wild type” species native to your region are generally a wise choice for the ecologically-minded gardener despite them not being quite as flashy as the cultivated varieties in some cases. Learn more about recommended varieties further down this page. Aster is versatile: Depending on the height, it’s suitable for borders, rock gardens, or wildflower gardens. As well as being a valuable pollinator plant for bees and butterflies, its tasty seed heads are sought by cardinals, chickadees, finches, nuthatches, and many other seed eaters. PLANTING Asters prefer areas with cool, moist summers and cool nights in sites with full to partial sun. In warmer climates, asters do not like the hot midday sun. Soil should be moist but well-drained and loamy. Wet clay soil will lead to root rot, and dry sandy soil will lead to plant wilt. Mix 2 to 3 inches of compost into the soil before planting. When to Plant Asters The best time to put young aster plants in the ground is in mid-to-late spring after the danger of frost has passed. (See local frost dates.) Or, you can plant mature, potted asters when available at garden centers (typically in the late summer or early fall). Asters can be grown from seed, but germination can be uneven. If desired, plant seeds in the fall or start them indoors in the winter. How to Plant Asters When planting young aster plants outside in the spring, space them 1 to 3 feet apart, depending on the type and how large they’re expected to get. Fully-grown asters, such as those available in late summer or early fall, should be planted about 3 feet apart. If planting seeds, sow 1 inch deep in pots or flats and refrigerate them for 4 to 6 weeks to simulate winter dormancy. This cold period will kick-start germination. Water well and spread mulch around the plants to keep the soil cool and prevent weeds. Asters are highly attractive to pollinators, especially bees and butterflies. GROWING Add a thin layer of compost (or a portion of balanced fertilizer) with a 2–inch layer of mulch around the plants every spring to encourage vigorous growth. If less than 1 inch of rain falls weekly in summer, water regularly. But beware. Many asters are sensitive to too much or too little moisture. They will lose their lower foliage or not flower well. Watch for stress and try a different watering method if your plants lose flowers. Stake the tall varieties to keep them from falling over. Pinch or cut back asters by one-third once or twice in the early summer to promote bushier growth and more blooms. Don’t worry; they can take it! In winter, cut back asters after the foliage has died, or leave them through the winter to add some off-season interest to your garden. Birds may munch on the seeds, too. Note: Aster flowers that mature fully may reseed themselves. The resulting asters may not bloom true to their parent. (In other words, you may not get the same color flowers you planted initially!) Divide every 2 to 3 years in the spring to maintain your plant’s vigor and flower quality. RECOMMENDED VARIETIES The most common asters available in North America are the New England aster (Symphyotrichum novae-angliae) and the New York aster (Symphyotrichum novi-belgii). Both of these plants are native to North America and are great flowers for pollinators. We recommend planting a native species of aster over a non-native species when possible, so talk with your local Cooperative Extension or garden center about which species are best suited to your area. Look for varieties with disease resistance. North American Asters New England asters (S. novae-angliae): Varieties have a range of flower colors, from magenta to deep purple. They typically grow larger than New York asters, though some varieties are smaller. New York asters (S. novi-belgii): There are many, many varieties of New York asters available. Their flowers range from bright pink to bluish-purple and can be double, semi-double, or single. Blue wood aster (S. cordifolium): Bushy with small, blue-to-white flowers. Heath aster (S. ericoides): A low-growing ground cover (similar to creeping phlox) with small, white flowers. Smooth aster (S. laeve): A tall, upright aster with small, lavender flowers. Aromatic aster (S. oblongifolium): Multi-branched at the base, stiff upright stems, with lavender or pink flowers. European/Eurasian Asters Frikart’s aster (Aster x frikartii) ‘Mönch’: Hailing from Switzerland, this mid-sized aster has large, lilac-blue flowers. Rhone aster (A. sedifolius) ‘Nanus’: This aster is known for its small, star-shaped, lilac-blue flowers and compact growth. HARVESTING Cut asters for flower arrangements when blooms are just beginning to open. Vase life is 5 to 10 days. Asters have side shoots, which will continue to develop. These can be cut for indoor arrangements once they are the size you like. Taken from https://www.almanac.com/plant/asters Till next time this is Becky’s Greenhouse, Dougherty Iowa [email protected] 641-794-3337 cell 641-903-9365 image from gardenersworld.com Good morning. Colder out this morning. The temperature is 20 degrees with a high today of only 38 low tonight of 28 degrees. I heard this morning; this will be the temperature for the rest of the month. We are going to have moisture this weekend, but I don’t think it is 12 inches of snow here for us in North central Iowa. I know you all are wanting spring, and it has been the first day of spring. Spring will come, but we need moisture and the temperature to be more seasonable, so June and July will be that way.
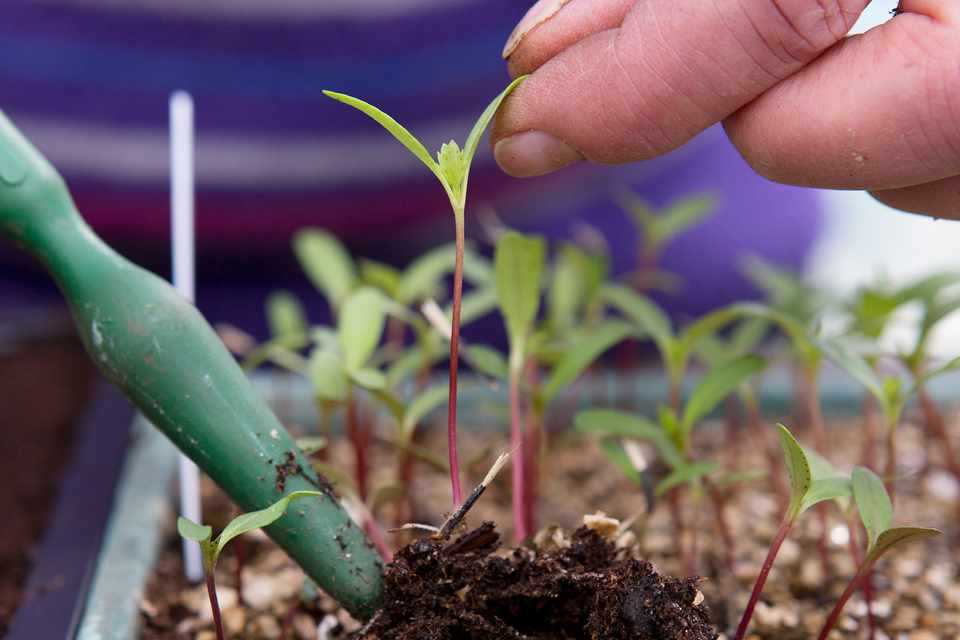
Larry and I were traveling yesterday and going west. As the sun set, the sun was directly in front of us. When the first day of Spring, and the first day of all, the sun sets directly in the western sky and rises directly in the east. Showing us that it was the first day of Spring, now the path of the sun will be setting moving to the north. Busy planting, watering and cleaning up the greenhouse. Question asked, I have tomatoes started now when do I transplant them ? Seeds that we sow…grow into seedlings, that become plants. We start the seeds in starter trays with small seed pods. Once the seeds germinate they become tiny seedlings that have just two sets of leaves.Do not try to transplant at this stage, as your seedlings are still very delicate. Continue to care for them until the next set of leaves begin to emerge. These new leaves are called true leaves. Once true leaves appear, and your seedlings grow double the size of the seed pod, it’s time to transplant to a bigger pot. To remove seedlings, I like to use a bamboo skewer to gently loosen soil from under the roots. Then slowly remove the seedlings, taking care to not disturb the soil near the roots. If you have multiple seedlings in one pod….you will have to separate them carefully without straining the roots too much. I like to transplant them in groups of two seedlings to one pot. Try not to hold the stem of the seedlings, if they snap, your seedling will be lost. Instead maneuver the plant gently into the new pot by carefully dangling the leaves between your fingers. If you happen to lose a leaf….it can still grow back. Put some moist soil in the base of the new pot. Place the seedling in the center and taking great care, press soil gently around the seedling. Try to straighten and center the seedling in the new pot, by moving the soil around it. Do not try to adjust the seedling by the stem! After transplanting, gently spray with water and keep in a sunny spot. You will find, once transplanted …your seedlings start to grow very rapidly. Continue to care for them with good sunlight and water till they grow into small plants and become double the size of the pot they are in. At this stage you can either transplant them to a bigger pot or plant them directly into your vegetable patch. Taken from https://greenfellas4you.com/tips-for-transplanting-seedlings/ Till next time this is Becky Litterer, Becky’s Greenhouse, Dougherty Iowa [email protected] 641-794-3337 cell 641-903-9365 image from lovethispic.com Good morning, first day of spring…Temperature is 36 degrees high today of high of 55 degrees. Clear skies and that will be what we have all day. Low tonight of 19 degrees. This is exciting to have spring, but Mother Nature is going to let us know this weekend WINTER isn’t over. Big snowstorm coming just don’t know where it will be or how much snow. I have seen 8 inches to 12 inches over Friday till Tuesday. Stay safe all. Here we go!
Welcome, vernal equinox! In 2024, the first day of spring is Tuesday, March 19 The word equinox comes from the Latin words for “equal night”—aequus (equal) and nox (night). On the equinox, the length of day and night is nearly equal in all parts of the world. This egg folklore became popular in 1945 following a LIFE article about the spring practice. “The origins of this myth are attributed to stories that the ancient Chinese would create displays of eggs standing on end during the first day of spring,” according to John Millis, assistant professor of physics and astronomy at Anderson University in South Carolina. “The ancient Chinese celebrated the first day of spring about six weeks earlier than the equinox”—not just on the equinox itself. As with most folklore, it’s only partly true. You should be able to balance an egg on its end on the equinox, but it’s possible to balance an egg on other days, too! Folklore or not, this egg trick sounded like fun to us. One spring, a few minutes before the vernal equinox, several Almanac editors tried this trick. For a full workday, 17 out of 24 eggs stood on end. Three days later, we tried this trick again and found similar results. Perhaps three days after the equinox was still too near. Perhaps the equinox has nothing to do with it. Perhaps we just don’t like to take ourselves too seriously! Try this yourself and let us know what happens. (Tip: You’ll probably have better luck balancing an egg if you try it on a rough surface or use an egg that has a bumpy end. Taken from https://www.almanac.com/content/first-day-spring-vernal-equinox Till next time this is Becky Litterer, Becky’s Greenhouse, Dougherty Iowa [email protected] 641-794-3337 cell 641-903-9365 image from gardenwhisper.com Good morning. The temperature at 10:00 AM is at 23 degrees and only a high of 37 low of 27 degrees. Cloudy now, but the forecast says for sunny. We will see. Back to winter coats, but I say this is ok. More seasonable weather spring will come with in the right time of the calendar.
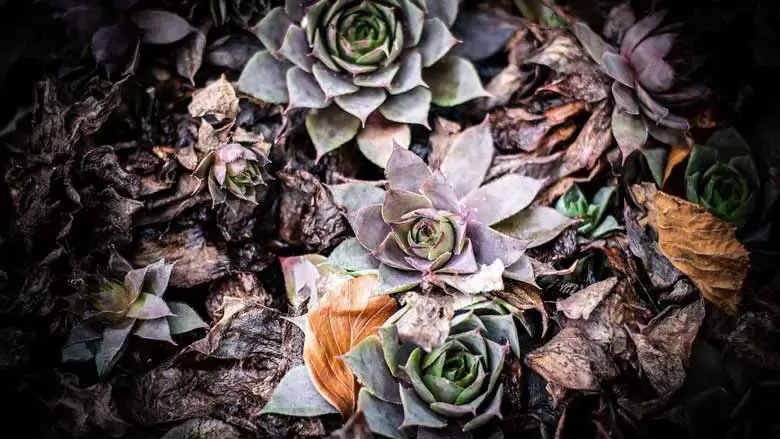
Personally, I am glad I didn’t take down the plastic walls because it was too warm and even too hot to work. Now the plastic walls are keeping the heat in 1/3 of the greenhouse we are heating and the plants are happier. Speaking of plants, we have lots of the plug tray here so planting will really continue and start. More hours at the greenhouse and less in the house and in the office. I do love this and take what gets done, gets done and it will come. I had a question about dying succulents. Here is what I found out. Why Is My Succulent Dying? By ALEXANDRA JONES Succulents are known for being hardy, low-maintenance plants, but that doesn't make them indestructible. Any succulent—including aloe, jade, echeveria, and haworthia—can be damaged or killed by improper care, the wrong conditions, or pest problems. Knowing how to identify and treat the issue can revive the plant before it's too late. If you're wondering why your succulents are dying, there's still hope. Once you diagnose the reason, you can use these tips to treat the problem and save your succulents. Here are six ways to save a dying succulent, plus steps for identifying the issue. Why Your Succulents Are Dying Before you can revive a dying succulent, you need to diagnose the problem. Overwatering, root rot, too much or not enough light, and pest infestations can all damage or kill succulents. First, examine the plant closely for pests. Look for signs that indicate scale (flat brown spots and sticky honeydew), mealybugs (white cottony masses), webbing (spider mites), or fungus gnats (small insects on or hovering around the soil surface). You'll also want to check out the leaves and stems. Soft, squishy leaves that may appear translucent and mushy, discolored stems are signs of overwatering. Leaves that are shriveled or brown and dry can indicate a lack of water. Look for signs of light issues, too. Dull color or a faded appearance, leggy or sparse growth, and loss of variegation can all indicate that your plant isn't getting enough light. Although many succulents require bright, direct sunlight, others need less harsh conditions. Tan or brown patches on leaves can indicate sunburn from too much light. Tip Dying or damaged leaves or stems can indicate a problem. But the occasional dead leaf, especially lower on your succulent's stem, is completely normal and nothing to worry about. Cut Back on Watering If your succulent appears to be overwatered, the first step is to stop watering immediately. In mild cases, you may be able to simply let the soil dry out and trim away any damaged leaves. Allow the soil to dry out completely before watering again. Repot in Fresh Soil In a severe case of root rot caused by overwatering, repotting may be necessary to save your plant. Use clean, sharp shears to cut away affected leaves. Remove the plant from its pot and examine the roots, trimming away any that are black and mushy. If rot is severe, it may be necessary to cut away all but unaffected stem tips or rosettes and replant those to propagate a new plant. Use fresh succulent soil with lots of drainage, and consider repotting into a terra cotta container, which wicks away moisture more quickly than plastic or glazed ceramic. Water Deeply If you haven't watered your succulent in quite a while and its environment is very hot, dry, and sunny, underwatering could be to blame. Give the soil a deep soaking, or try bottom watering the plant to rehydrate the soil. Going forward, allow the soil to dry out between waterings, but don't go too long without giving your plant a drink. Increase Light Leggy, etiolated, and faded succulents that are growing slowly or not at all may not be getting enough light. Succulents like prickly pear cactus, senecio, echeveria, aloe, and paddle plants all grow best in bright, direct sunlight, just to name a few. Move plants closer to a light source—ideally a south-facing or west-facing window—or use a grow light. Reduce Light On the other hand, some succulents can't handle harsh direct sunlight, even indoors. Lower-light succulents that can tolerate part shade include bear paw, aloe, haworthia, mistletoe cactus, snake plant, and ponytail palm. If you're seeing light brown or dry-looking spots on leaves and stems, your plant could be getting sunburned in its current conditions. Move it further from the light source or into an east-facing window, which gets milder light. Treat for Pests If you've identified houseplant pests as the reason your succulents are dying, you can take steps to treat the infestation. Dab away pests with a cotton swab or ball dipped in rubbing alcohol while avoiding getting alcohol on the stems or leaves to prevent damage. You can also wash them away with insecticidal soap or use organic pesticides to get rid of the bugs but make sure they're safe for indoor use. Taken from https://www.thespruce.com/why-is-my-succulent-dying-7558551 Till next time this is Becky Litterer, Becky’s Greenhouse, Dougherty Iowa [email protected] 641-794-3337 cell 641-903-9365 image from publicdomainpictures.net Good morning, here we go with another 70’s degree day. At 8:00 AM it is 40 degrees. Sounds like it will rain tonight and tomorrow. 15% chance if rain today, 90 % of rain tomorrow. I found this article that explains the chances of rain. All I can say hope all of us get rain which we need very badly.
How to Calculate a Chance of Rain by Bob Berman When the local weather station (or your weather app) says that there is an “80% chance of rain,” do you assume that this means you have an 80% chance of getting rained on? Not true. Bob Berman explains what a “chance of rain” really means! If you’re a sky watcher like yours truly, the first step in observing the sky is having decent weather. We probably all check the forecast from time to time. But relatively few of us know how to make sense of it. Many of us would assume that an ”80% chance of rain’ means you have an 80% chance of getting rained on. This sounds logical but is incorrect. Guess again. Does it mean there’s a chance of rain across 80% of the forecasted area? Nope. That’s because weather forecasts give their “percentage chance” in probability. The answer? An “80% chance of rain” means an 80% chance that rain will fall somewhere within the forecasted area. Rain refers to 0.01 inch or more. Confused? If you want to understand this further, read on. How to Calculate a Chance of Rain So let’s say the forecast goes like this: Sunday, 40% chance of rain; Sunday night, 40% chance of rain; Monday, 40% chance of rain. Now, maybe you’re a gardener and really want it to rain (consider catching the rain by using rain barrels in your garden!). Or, perhaps you have a stargazing session or outdoor event planned and desperately want it NOT to rain. The question is simple: If the Weather Service’s forecasts are accurate, what are the chances that it will rain sometime during the period? What do you think? With a 40% chance tomorrow, tomorrow night, and then again the next day, what’s the likelihood we’ll get rain any time during that entire time span? Here’s how you calculate it. Stick with me for a few minutes. This is fun, as long as you don’t totally hate math. First, you determine the odds that it won’t rain. In this case, it’s 60% for each of the three periods in question. So, you grab your calculator and punch in 0.6 x 0.6 x 0.6, which equals 0.216. Bingo: those are the odds that it will not rain during the entire three periods in question. It is 21.6%. Finally, you subtract this from one to get the chance that it will rain: 78.4%. Roughly speaking, there’s an 80% chance it will rain. Amazing, right? Let’s do another for practice. Say the Weather Service predicts only a 30% chance of rain or snow today, and again tonight and again tomorrow. First, you determine the odds that it won’t rain. In this case, it’s 70% for each of the three periods in question. Now you multiply 0.7 x 0.7 x 0.7, which equals 0.343, which means a 34% percent chance of no precipitation falling. Thus, there is a 66% chance that it will rain or snow during the period. If this sounds illogical and you’re unconvinced, consider that 30% is roughly a one-in-three chance. Pretend you had three marbles in a bag, one red and two green. You blindly reach in and pull out a marble. What are the odds you’ll get the red one? It’s one in three, right? But now, pretend you get three chances. If you first pull out a green one, you throw it back and get another try, and then a third try. Doesn’t logic tell you that with three chances, you’re likely to succeed? Similarly, with three chances for rain, even if it’s just a one-in-three probability each time, you’ll likely get wet when the three periods in question have elapsed. Just thought we’d get this out of the way. Taken from https://www.almanac.com/chance-rain-what-does-really-mean? Till next time this is Becky Litterer, Becky’s Greenhouse, Dougherty Iowa [email protected] 641-794-3337 cell 641-903-9365 35th year Playing in the dirt Helping you grow Becky’s Greenhouse Dougherty Iowa Good morning. The temperature at 7:30 AM is at 39 degrees with expected high of 70. Unbelievable. We are busy planting and what is planted is growing well because of the sunlight and the natural heat. All doors of the greenhouse north and south will be open. Josh came yesterday and checked on his bees. They are busy going in and out and finding pollen. He said from maple trees. He said they were very healthy and doing well. That is good. I am going to set out some shallow plant trays with rocks in them for water. See if they come around.
I am reading a lot about not starting the gardens yet or cleaning off the garden beds. I know how hard that is when it is still so warm out, but we are still in winter, and we could have some cold weather. It will be interesting to see how our planting will go. We need moisture and I have asked how the soil is and many are saying very mellow but very dry. The East coast is having lots of rain, let us hope that we have some of that soon and the month of April. This is the start of our 35th year of playing in the dirt and helping you grow. Where did this time go? Seed potatoes and onion sets will be here the last week of March. I have ordered onion plants. I am looking at getting sweet potato bare roots to plant for the garden but that isn’t till the end of May when the nights are warm. Fingerling potatoes are also ordered. We have on hand bulk vegetable seeds. I have started some peas, and radishes in containers for inside the greenhouse. This week will do spinach and lettuce. I will let you know how that goes. We have seed trays to plant, we have plant plug trays to transplant, we have succulents to transplant. My days are not wondering what I will do today. stay safe Till next time this is Becky Litterer, Becky’s Greenhouse, Dougherty Iowa [email protected] 641-794-3337 cell 641-903-9365 image from Reneesgarden.com Good morning. We are at a seasonable temperature in the 40’s for this time of the year. I am so glad about that. With the above normal temperatures this early, I ask myself “ What temperatures will June, July and August be like?
Have you started any tomato plants? There is nothing more fun to watch to grow from seeds. Here are some ideas on growing them. I have finally seen the reason for the thick stock on the tomato plants. Cool and bright are the best conditions for growing healthy tomato seedlings. Finally I see the secret of growing a stocky stem….cool which I grow them at night at a cooler temperature. Simple steps to starting tomato seeds inside by Robin Sweetser By starting your own tomatoes from seed indoors, your fruits turn red earlier and fruit longer for a better harvest. Plus, you’ll have access to many more varieties than what you’ll find at a garden center. Check out these easy steps to starting tomato seeds for success. Any kind of tomato can be started from seed: beefsteaks for slicing, romas for sauces and salsas, and cherry or grape tomatoes for salads and appetizers. The cherry tomatoes are always a favorite with beginners; Texas Wild (a pea-size red heirloom), Aunt Ruby’s German Green cherry, Super Snow White cherry, Tumbling Tom cherry, and Chocolate cherry are all prolific. It’s always fun to grow a few heirlooms. Try Pineapple, Schimmeig Stoo, Amish Paste, and Japanese Black Trifele. How about a blue or black tomato? When to Start Tomato Seeds Tomatoes are a warm-season crop and can’t be outside until the soil is quite warm (65°). This is when nighttime temperatures are consistently above 50°F. The challenge is that tomatoes take a long time to harvest (60 to 100 days, depending on variety), so some gardeners don’t have a long enough growing season to get much yield. What to do? You can buy this mix at the store, or here’s how to make your own potting mix. Many gardeners start the seeds early inside so they can set the small plants (“transplants”) outside as soon as the soil is warm enough! It’s best to start seeds about 4 to 6 weeks before the last spring frost date. Don’t start too early, or you’ll just end up with leggy seedlings and later stunted growth and wilting. How to Start Tomato Seeds Required materials: Seeds, seed-starting containers, seed-starting mix, plastic wrap, and water. Any type of shallow container will do—from a traditional seed-starter tray to recycled salad containers or yogurt cups. Just make sure the container has drainage holes, or you poke in your own holes. A seed-starting mix is not dirt or soil. It’s a soil-less medium that is very fine, light, and fluffy so that tiny seeding roots can grow easily. How to Start Tomato Seeds 1. Use a fresh seed-starting mix. Moisten the mix and fill your seed-starting containers. 2. Press in your seeds about 1/2-inch deep, and water very gently (so you don’t dislodge the seeds). Tip: Some gardeners use mycorrhizal fungi inoculants when pressing seeds into the planting mix. Simply dampen the seeds and roll them in the powder. Fungal hyphae or threads form on plant roots almost immediately and gather extra nutrients and water to fuel development. Spray bottles are great for delivering a gentle stream of water right where you want it. 3. If you are growing multiple varieties, label everything so you can keep track of your plants. Popsicle sticks are a handy way to label varieties, but you can also use laundry pegs, wine corks, pot fragments, pebbles, or whatever is handy. 4. Cover the containers with plastic wrap or place them in a tray that has a dome lid to keep them moist. They shouldn’t need watering again until they germinate, but check them daily just to make sure they haven’t dried out. Water gently again if necessary. 5. Place in a warm, dark location. Tomatoes germinate best at 65 to 85 degrees. Tomatoes are a warm-season crop, so setting seed flats or pots on a heat mat promotes rapid germination. But don’t let it get too hot. Don’t go over 95 degrees. The seedlings should pop up in about a week. 6. Once the seeds are up, remove the heat source. Move them to a place with strong direct sun or place under grow lights where they will get bright light for most of the day. An LED grow light or fluorescent shop light kept on for 16 hours a day works best. Temperatures between 50 to 70 degrees are perfect for growing rugged plants. You want them to be short and stocky, not long and leggy. Keep the grow lights two inches from the plant tops. I have to adjust the distance every other day. Cool and bright are the best conditions for growing healthy tomato seedlings. Finally I see the secret of growing a stocky stem….cool which I grow them at night at a cooler temperature. 7. When your plants have two sets of true leaves, it is time to pot them up into larger individual containers, such as 16-ounce plastic cups with holes poked in the bottom. If they are getting leggy, bury the lower part of the stem to bring the leaves closer to the surface of the soil. They will grow more roots along the buried stem. True leaves are starting to form above the seed leaves. 8. As the plants grow, set up a fan to blow gently across them or brush the tops with your hand to encourage strong stems. I also run a small oscillating fan directed at the plants. The constant movement triggers the release of hormones that build thicker stems. The resulting tomato transplants end up stockier than normal with sturdy stems, which are more durable when set into the garden bed. You won’t have leggy plants, and you’ll avoid diseases and rot by having to bury long, thin stems. 9. Don’t overwater! It is the leading cause of seedling failure. Keep raising your lights to accommodate the growing plants. 10. If your plants outgrow their containers before it is time to transplant them outside safely, move them up into a bigger pot. Each time you repot them, bury the lower part of their stem to stimulate more root growth for a stronger plant. 11. When you’re ready to move them outside, you need to harden off the seedlings by gradually exposing them to direct sunlight, wind, and night temperatures outside before planting them out. For about 10 days, you will need to move them outdoors for a few hours of the day in a dappled shade area and then bring them back inside. Do not leave them outside in temperatures lower than 50°F or on windy days. If your climate is very windy, you may need to consider a cold frame or plastic sheeting for protection. Taken from https://www.almanac.com/starting-tomato-seeds-indoors Till next time from Becky’s Greenhouse, Dougherty, [email protected] 641-794-3337 cell 641-903-9365 image from Pinterest.com image from plants.shadeofgreeninc.com WOW 35 degrees all ready at 8:00 AM, high again today in the 50’s. Blue clear sky this morning, and clouds moving in this afternoon. Also with those clouds they are saying we will get rain tonight and tomorrow. The whole state so we will see how that goes. We need moisture.
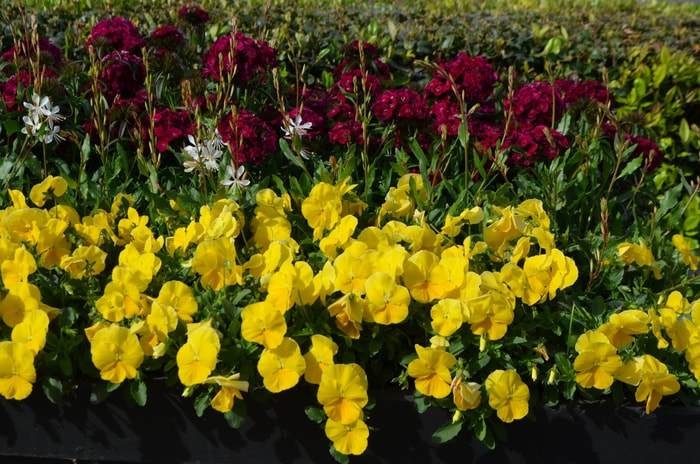
What are you planting now, Becky? I am just working on Cool Wave Pansies. I have found that the yellow Cool waves pansies are the most colorful, so that is what I am growing. I have them in a big 4 pack, in baskets and in different sizes containers to use in your gardens. Here is the information about them. If you like pansies you will like these because they do bloom all season long. The Ultimate Guide for Growing Cool Wave® Pansies One trip to the garden center for lush baskets or pots for in-ground planting is enough to convince anyone that Cool Wave is a cool-season gardener’s dream! Good for containers and borders, as well as a ground cover, they are tried-and-true for reliable color in Spring and Fall. Pansies are beautiful on their own or when planted with other cool-season flowers such as violas, primroses, trailing lobelia and sweet alyssum. Here’s a guide to grow your best pansies ever. When to Plant Cool Wave Pansies can be planted in early Spring or Fall. Plant the seedlings in the ground when it softens up in the Spring. They grow best in soil temperatures between 45-65°F (7-18°C). Pansies can tolerate a light frost just after planting but try to hold off on putting them in the ground if temperatures are still regularly reaching well below freezing. Where to Plant Cool Wave Plant in moist, humus-rich, well-drained soil. Pansies like full or partial sun but thrive in cooler temperatures. The ideal planting site will get morning sun but avoid the heat of the late afternoon. Planting in the Ground Space the plants about 10-12 in. (25-30 cm) apart. They will spread about 24-30 in. (61-76 cm) and grow to 6-8 in. (15-20 cm) tall. Cool Wave Pansies in Planters Pansies are great for containers. Plant in potting soil in large, portable containers so the plants can be moved to a cooler area when the sun starts to get stronger. Early in the Spring season or in the Fall, a south-facing spot is best. During the Summer, move pansies to an east-side setting for morning sun and afternoon shade. Caring for Cool Wave Remember to water pansies regularly to avoid wilt. A general, all-purpose fertilizer applied every two weeks will help them grow. Remove faded or dead flowers to encourage the plants to produce more blooms and prolong the blooming season. Taken from https://www.wavegardening.com/en-us/Blog/2021/10/11/the-ultimate-guide-for-growing-cool-wave-pansies.html Till next time this is Becky Litterer, Becky’s Greenhouse, Dougherty, Iowa [email protected] 641-794-3337 cell 641-903-9365 |
AuthorHi! My name is Becky and I am a Master Gardener. I own Becky's Greenhouse in Dougherty, Iowa. Archives
March 2024
Categories |
|





 RSS Feed
